Skip to the next step by clicking here
Why do you need to do this?
The Payments system allows us to set up one time or recurring credits and debits to employees payrolls or banks. They are generally Benefits, Deduction, Advances (Loans), Adjustments, Vacation Pay or Miscellaneous payments. Payments are crucial to generate an accurate Payroll.
Some examples of payments that affect the generated payroll are:
- Government deductions
- Withholding BIR Tax
- SSS
- PhilHealth
- Pag-ibig
- Bonuses
- Payroll Advances
- Loan deductions
- Payroll Adjustments
- 1 time allowances
What steps do you need to take?
There are three ways to create payments:
1. Payments tab in the Account Settings Page (Global Payment)
- If you want to set up payments for all employees in your organization, add the payment via the “Settings” page on the “Payments” tab.
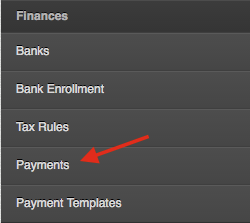
- Click on “Add a new Payment”
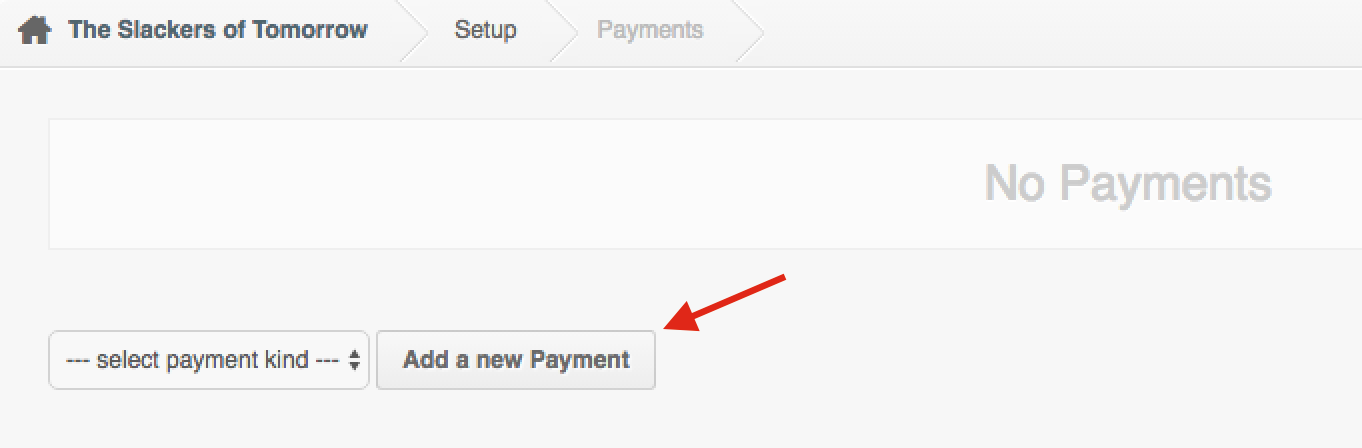
- Fill in the information and click “Create”.
- Any Global Payment you create, will be automatically added to all employees on the account, and will appear on their profile payments page under the “Account Payments” section.
- You can override a global payment for specific employees via their Profile Page, Payments Tab and clicking on the “Padlock” on the desired payment to disable.
- You can adjust a global payment settings for specific employees via their Profile Page, Payments Tab and clicking on the “Edit” button on the desired payment to edit.
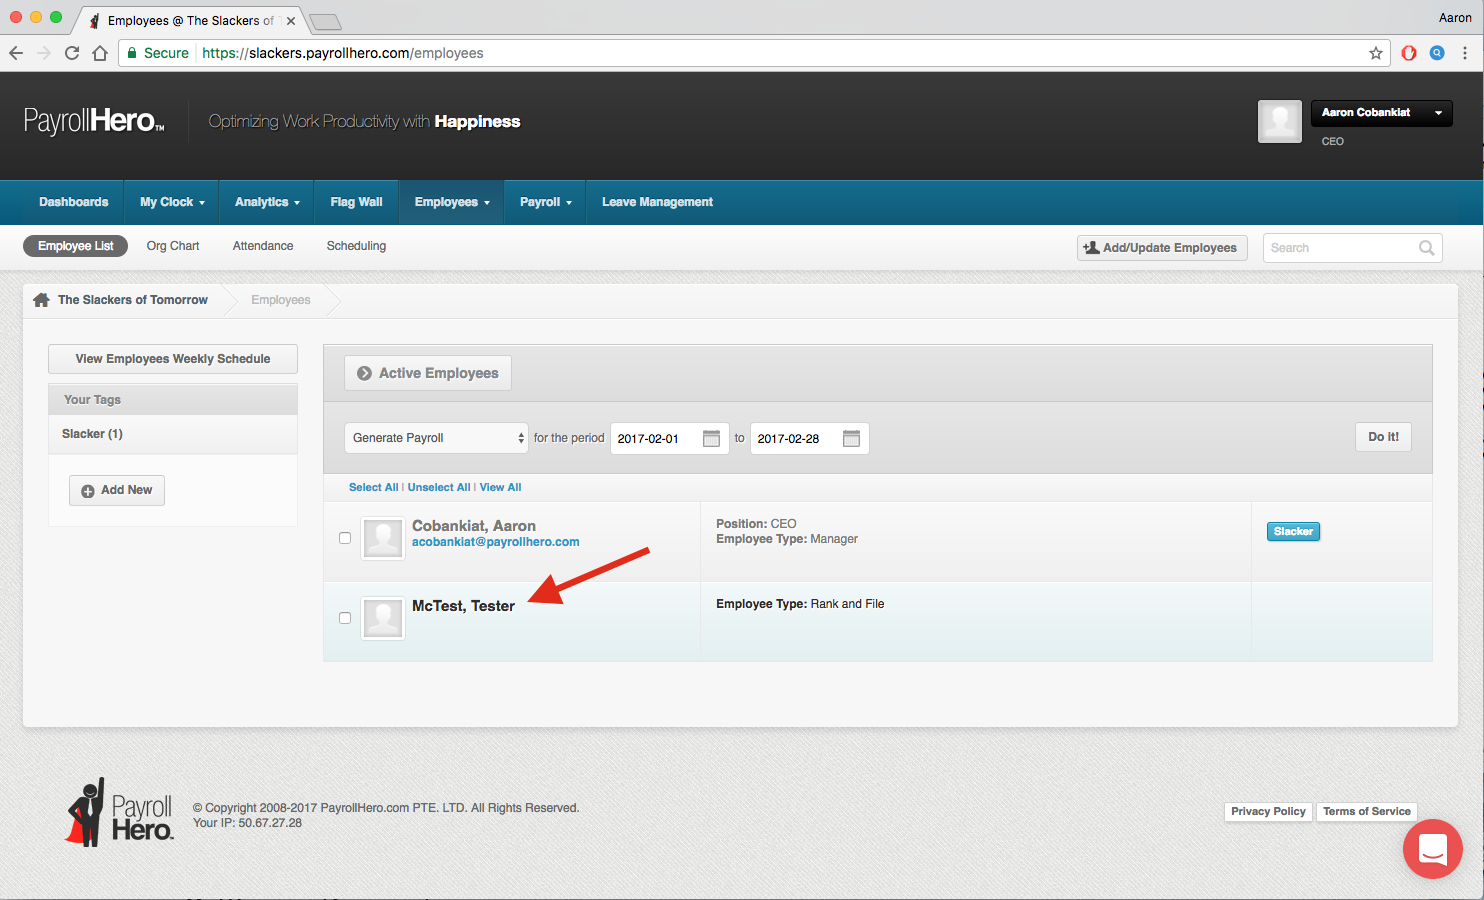
2. Employee Profile (Per employee)
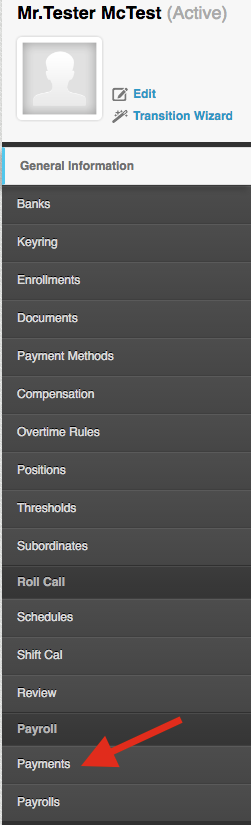
- If you want to set up a payment for one particular employee, you need to go to the Employee Profile and then click on the “Payments” Tab.
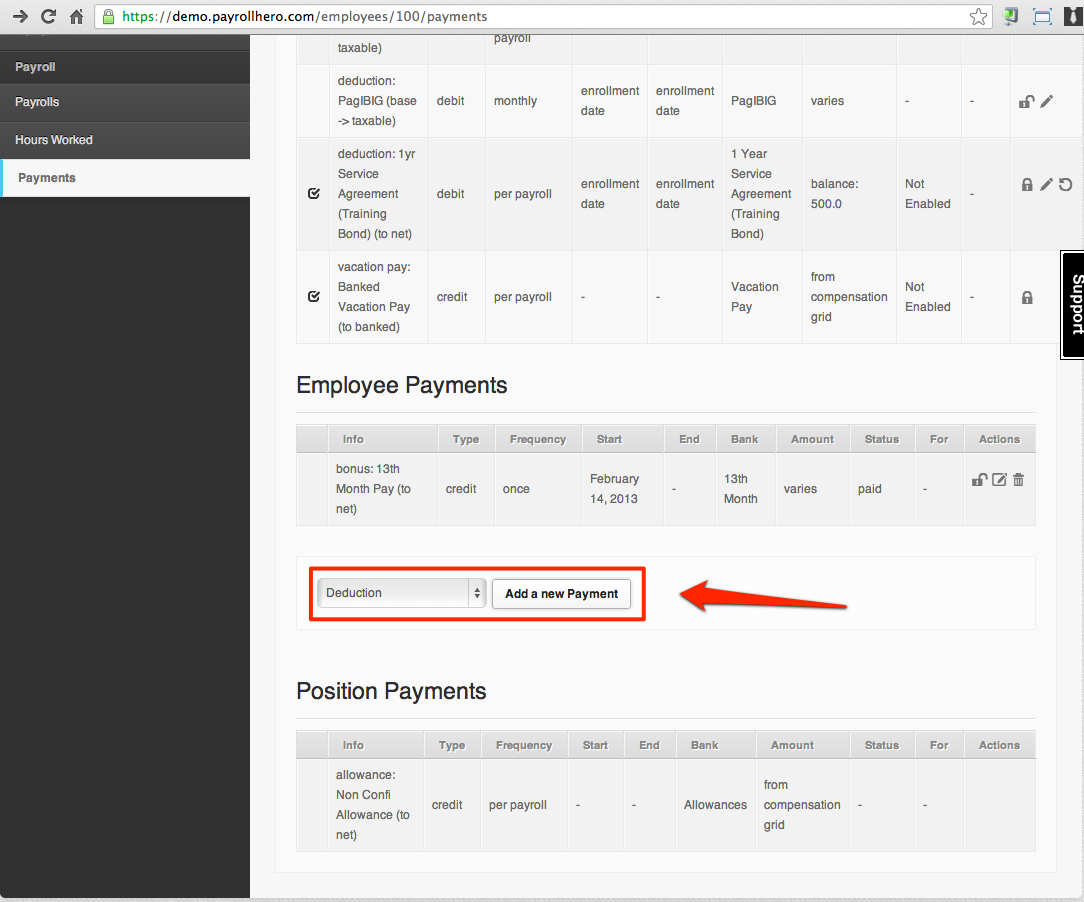
- Any employee specific payments will appear under the “Employee Payments” section of the page.
3. Employee profile (Multiple Employees)
- If you want to set up a payment for a group of employees, we recommend to use a Payment Template.
For details on this please check the article How to Setup Payment Template Using the Multi Insert – Payment Create Tool?
Setting up Payments:
The Payments system was designed to be very flexible and allows you to adjust different settings to match your desired outcome.
We have created a set of different templates for the most common payment types. These templates are further detailed at the end of this article.
All Payments, regardless of the template chosen will have the following settings:
Payments Main Settings
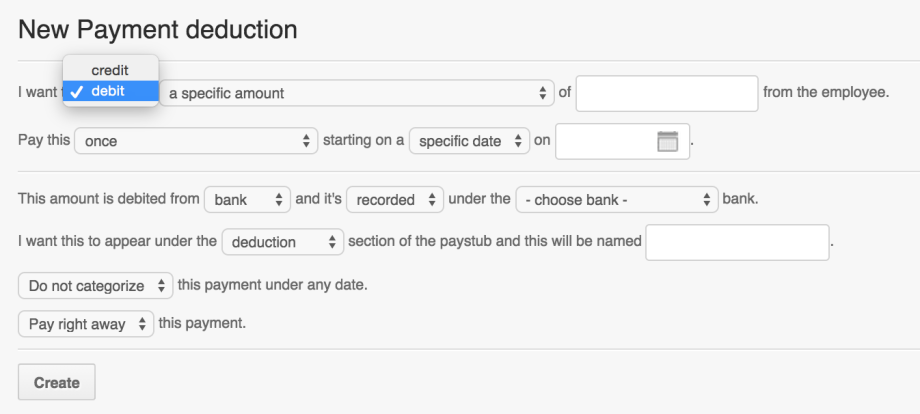
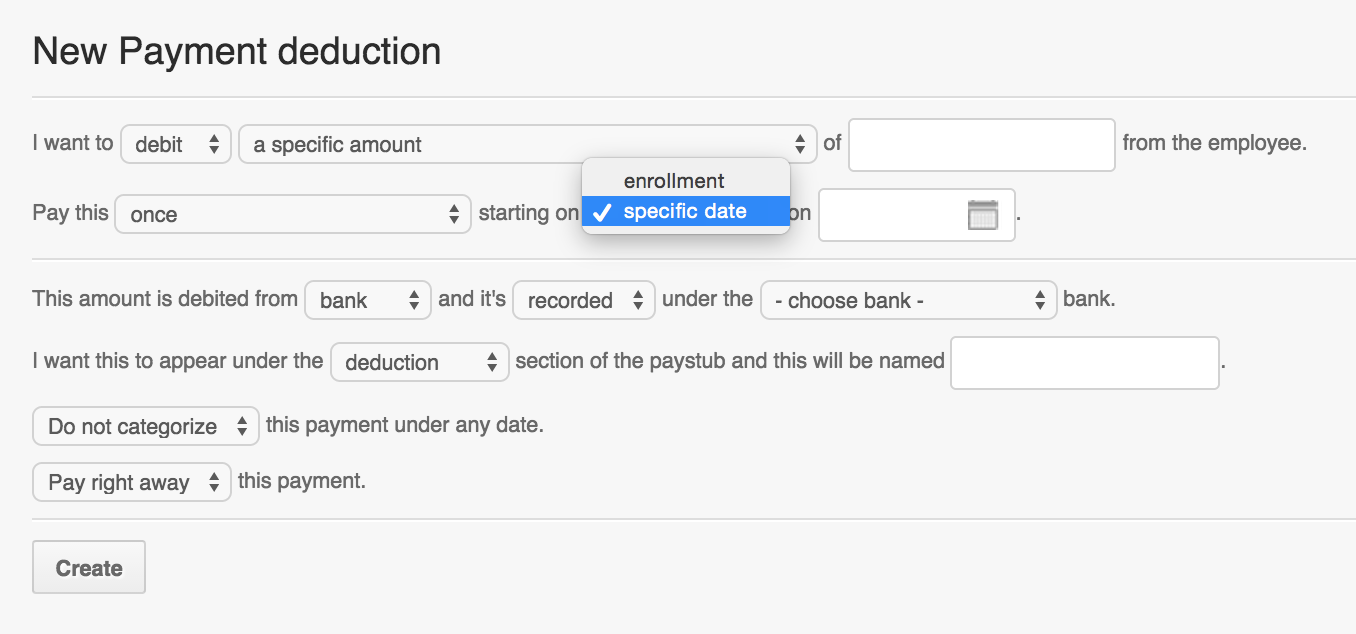
1. Debit or Credit
- If you want to deduct an amount to the employee’s payroll, then the payment should be set to DEBIT.
- If you want to add or pay employees a specific amount, then the payment should be set to CREDIT.

2. Bank, Gross, Net
- If you want the amount on the payment to “banked” the set the payment to the specific BANK
- If you want the amount to be “taxable” then set it to GROSS.
If you want the amount to be “non taxable” then set it to NET.

3. Start date
The system allows you to use either an “enrollment date” or a “specific date” to add the payments on the employee’s payroll:
- If you are using an “enrollment” date…
Ensure that the employee also has the enrollment added to their profile. This “Enrollment” is where we add the start date for the payment. If there is no enrollment set on the employee profile, the payment won’t affect the employee. For details on this, please view the articles on how to setup enrolments and how to add enrollments on the employee profile
- If you are using a “specific” date…
As long as that date is within the payroll generation pay period dates, then the payment will be added on the employee payroll.
Payment Templates:
To simplify the creation of a payment, the system offers a series of templates:
- Deductions or Payroll Adjustment
This is an example of a Payment setting for Deductions. To set this payment up:
1. Go to the Employee Profile
2. Click on “Payments”
Click to enlarge the picture
3. Under “Employee Payments” choose “Deduction” and click on “Add new payment”
5. Add the specific payment and set it up to something like this:
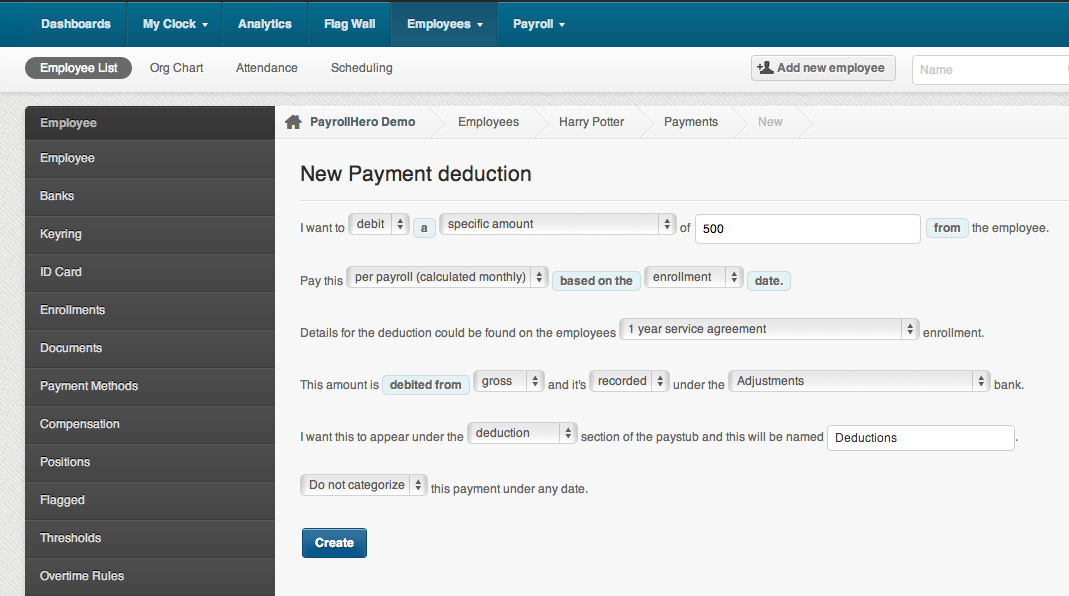 *If you choose “enrollment” date, make sure to add the enrollment on the employee profile.
6. Once you have added the deduction on the employee profile and generate payroll, it will be added only to that specific employee. If you add a deduction, under the “Account Settings” Payment page it will show up on ALL the employees on your account.
- Cash Advance/Loan
This is an example of a cash advance/ loan payment setting using an “Enrollment date”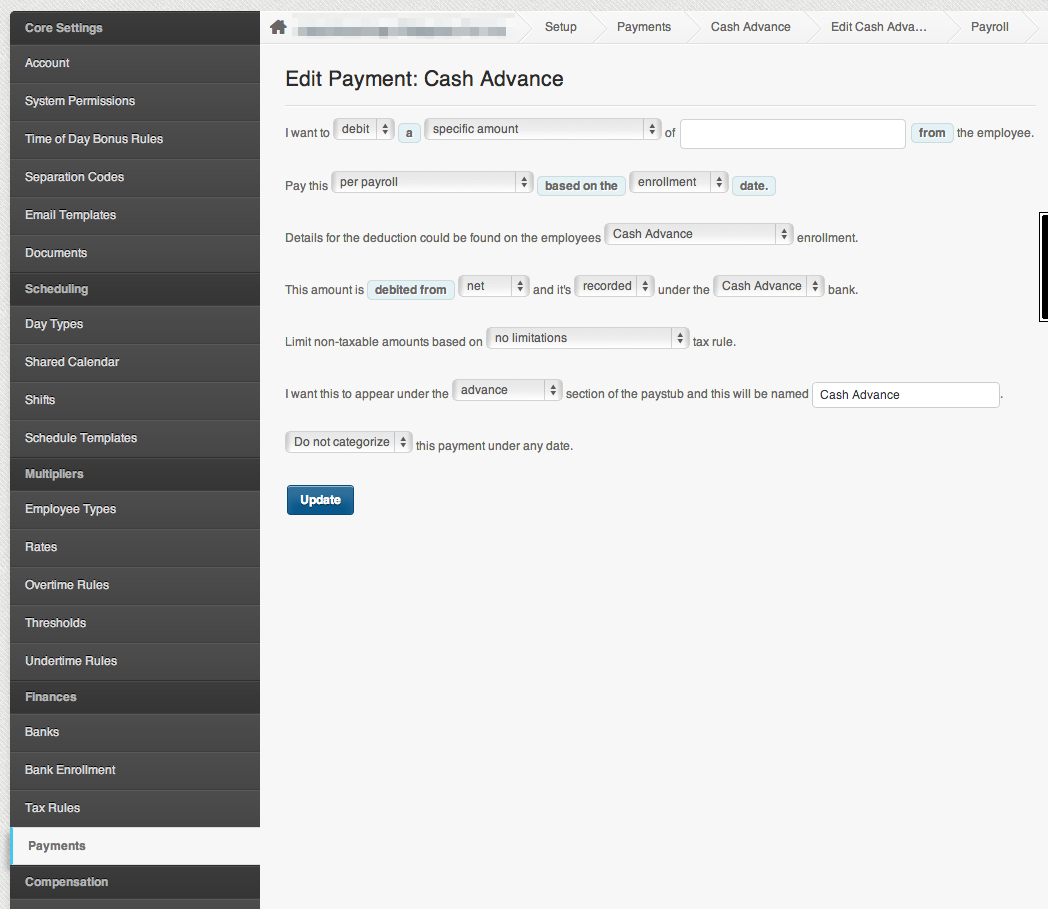
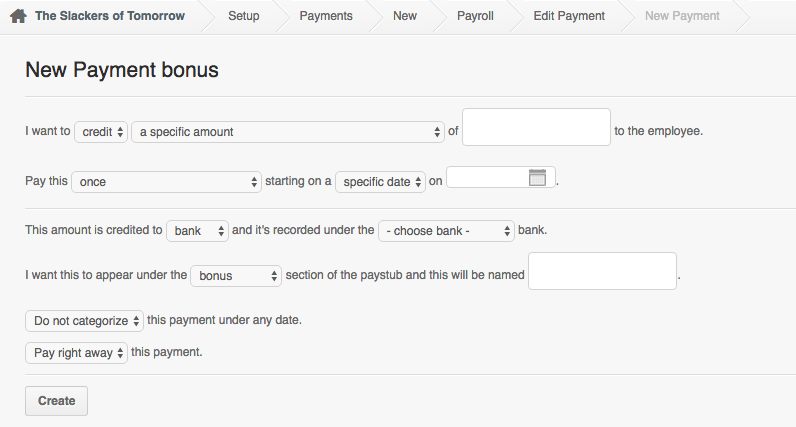
- Bonuses
This is a sample setting of a bonus paid once for an employee. You can either setup a “specific” date to when this bonus is paid out or use an “enrollment” date. Make sure that the employee has the enrollment added on their profile if not, they will not receive the payment!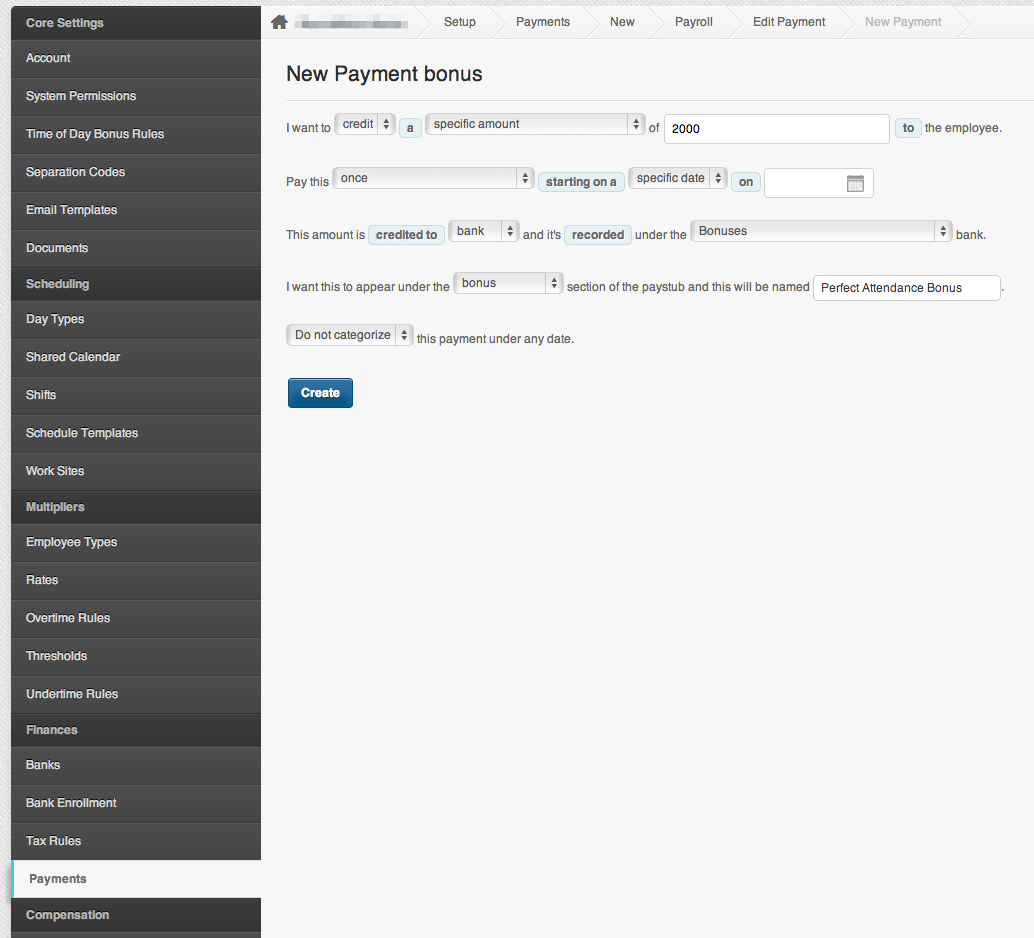
.
Government Payments
If you are a Philippine based company, you would need to setup the Government deductions for all employees.
In PayrollHero, we have already created a special payment setting for Philippine Government deductions:
Congratulations you are ready for Milestone 4!
![]()