Employees can now make overtime and official business requests.
How the Overtime / Official Business Request Works
Employee Request
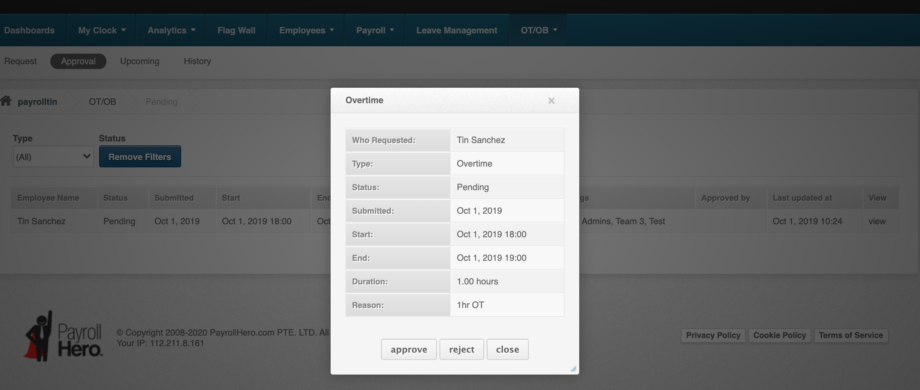
Employees can request for Overtime on the OT/OB tab:
- Start time will be the start time of the overtime
- End time will be end time of the overtime
Manager Decides
- Once the employee has requested for an Overtime, Manager receives a notification and can be approved on the “Approval” page

- All future approved overtime requests shows under “Upcoming” page.
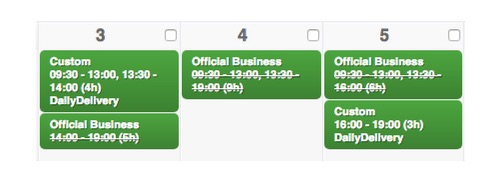
- If the OT/OB request is approved, the system will update the schedule of the employee as well
Employee and Manager OT / OB Request Notification
OT/OB Email Notifications should be sent automatically on both the Manager and Employee. Learn more about it here.
OT / OB History
Once Managers approve or reject any OT or OB employee request, they can view the history of OT and OB Request on their PayrollHero account.
Here’s how:
- Login to your PayrollHero Account.
- Click on the Employee Tab
- Click on the OT/OB History

- Employee Name
- Status: If the overtime/official business is Approved or Rejected
- Submitted: Date to when they submitted the request
- Start and End date
- Duration: The number OT hours requested
- What type of request: Overtime/Official Business
- Employee Tags: When you tag a specific employee profile on the Employee List, tags are also shown on the History page of the OT/OB Feature
- Approved by (Approver): Who approved the OT/OB Request
- Last Updated at (Timestamp): The date and time to when the OT/OB request has been approved or rejected
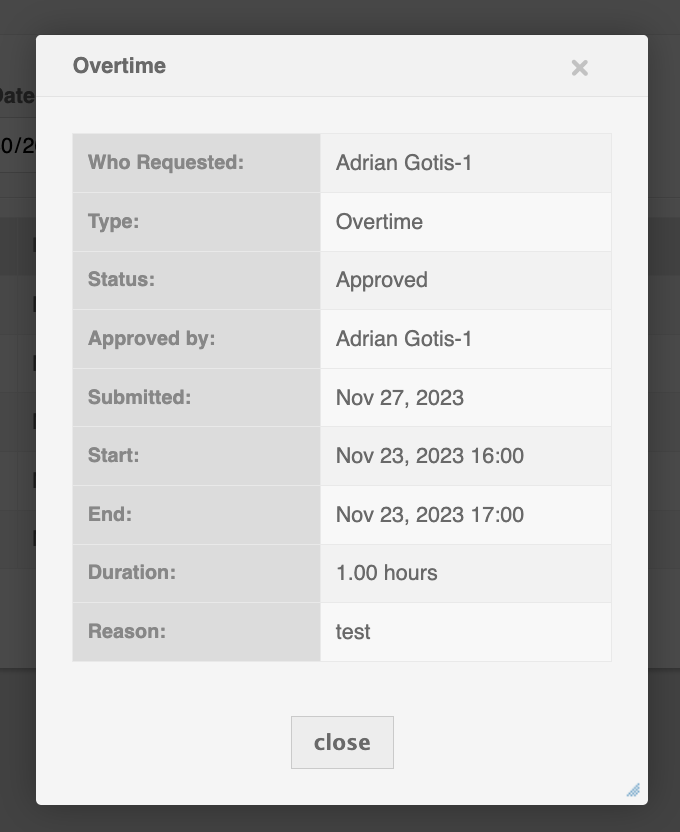
- View: Detail of the request)
- If you click on “View” it will show the details of the request
How to Manage Overtime / Official Business (OT/OB)
Similar to how Leave Management and Managing Teams work, there are 4 things that you would need to setup:
- System Permissions
Make sure that your Managers or Team Leaders have access to approve/reject OT/OB requests. In payroll hero we do this by assigning them to a predefined set of system permissions.
- Go to your Settings
- Click on System Permissions
- Edit the system permission of your Manager/Team Leader
- Under “Tag Based Employee Permissions”
- Set “Resolve OT/OB Requests” to “Can Edit”

Now that you have updated the system permission, you would need to go over the Manager/team leader’s profile, make sure that their system permission is what you have just updated.
-
Positions Hierarchy
Make sure that the employees under the Manager / Team leader has the correct parent hierarchy on the organizational Chart of the company:
- On the Settings page,
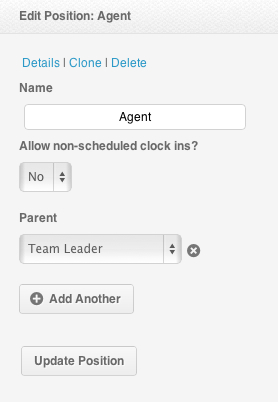
- Click on Positions (of the employee)
- Under “Parent”, select the team leader’s position and update.
-
Tags
Now that you have set up their system permissions and positions, we need to create a tag to group the Manager / Team Leader and his subordinate together. If this is already setup, proceed to #4.
- Click on the Employees tab
- If all employees are on the system already, great. You can then start creating tags.
If not, please make sure to add all your employees first. (Here’s a KB how) - On your Employee List
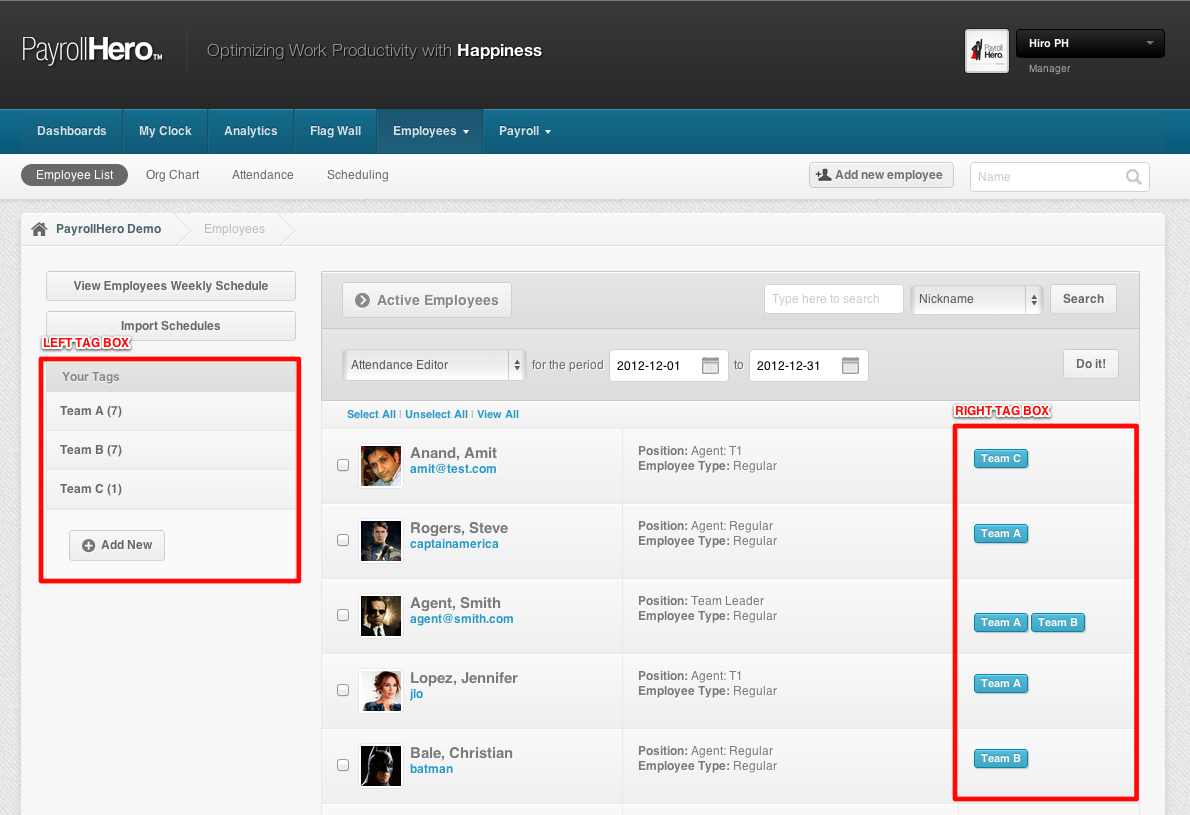
- Create a tag either using the right or left tag box.
- The tag should include all the team members and the team leader. You can add as many team leaders there is on a tag.
- If a team leader has 2 teams, then add his name on the tag on both teams. This way he can manage both as well.
-
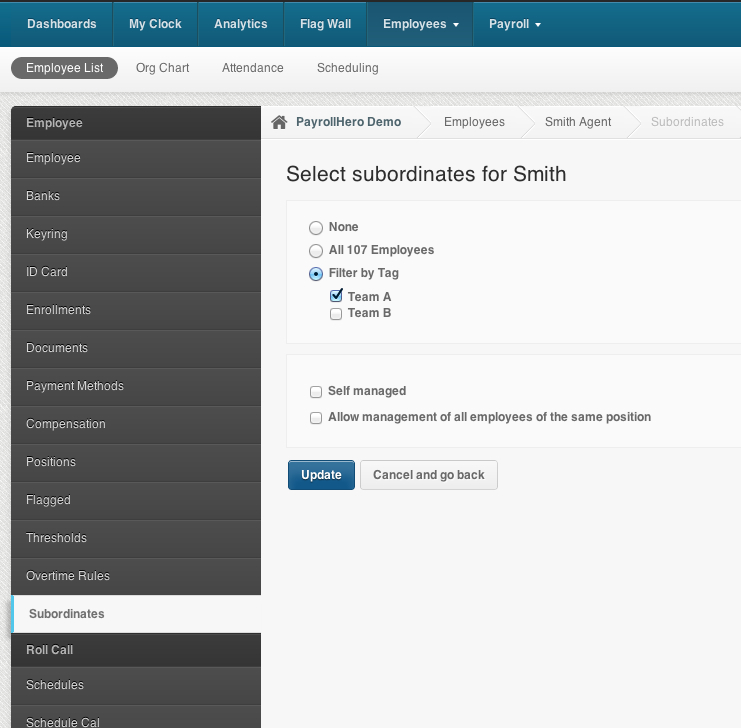
Subordinates
Now click on the Manager / Team Leader’s profile
- Click on the “Subordinates” page to see this:
-
- The subordinate page is where you’ll have the option to give your team leaders access to their teams. It can either be to all employees, or to a specific tag.
- “Self Managed” means that if you are giving the team leader access to manage himself. He/she can then create and resolve their own schedules.
- “Allow management of all employees of the same position” means that the team leaders can manage all team leaders or all position same as his.
- Once you’re done, click on Update and that’s it!
And that’s it! If you have any questions or feedback, email us at support@payrollhero.com

