The Payroll Register is a list of payroll information per employee. It’s a breakdown of where money came and went in a given date range, including all deductions, bonuses, etc. In the report generator you can add categories of information that you want to include in the report; you can also specify the dates that you would like the report to run from and to. If you enter a date range that crosses multiple payroll periods they will be combined into a total amount, per person.
To generate a Payroll Register:
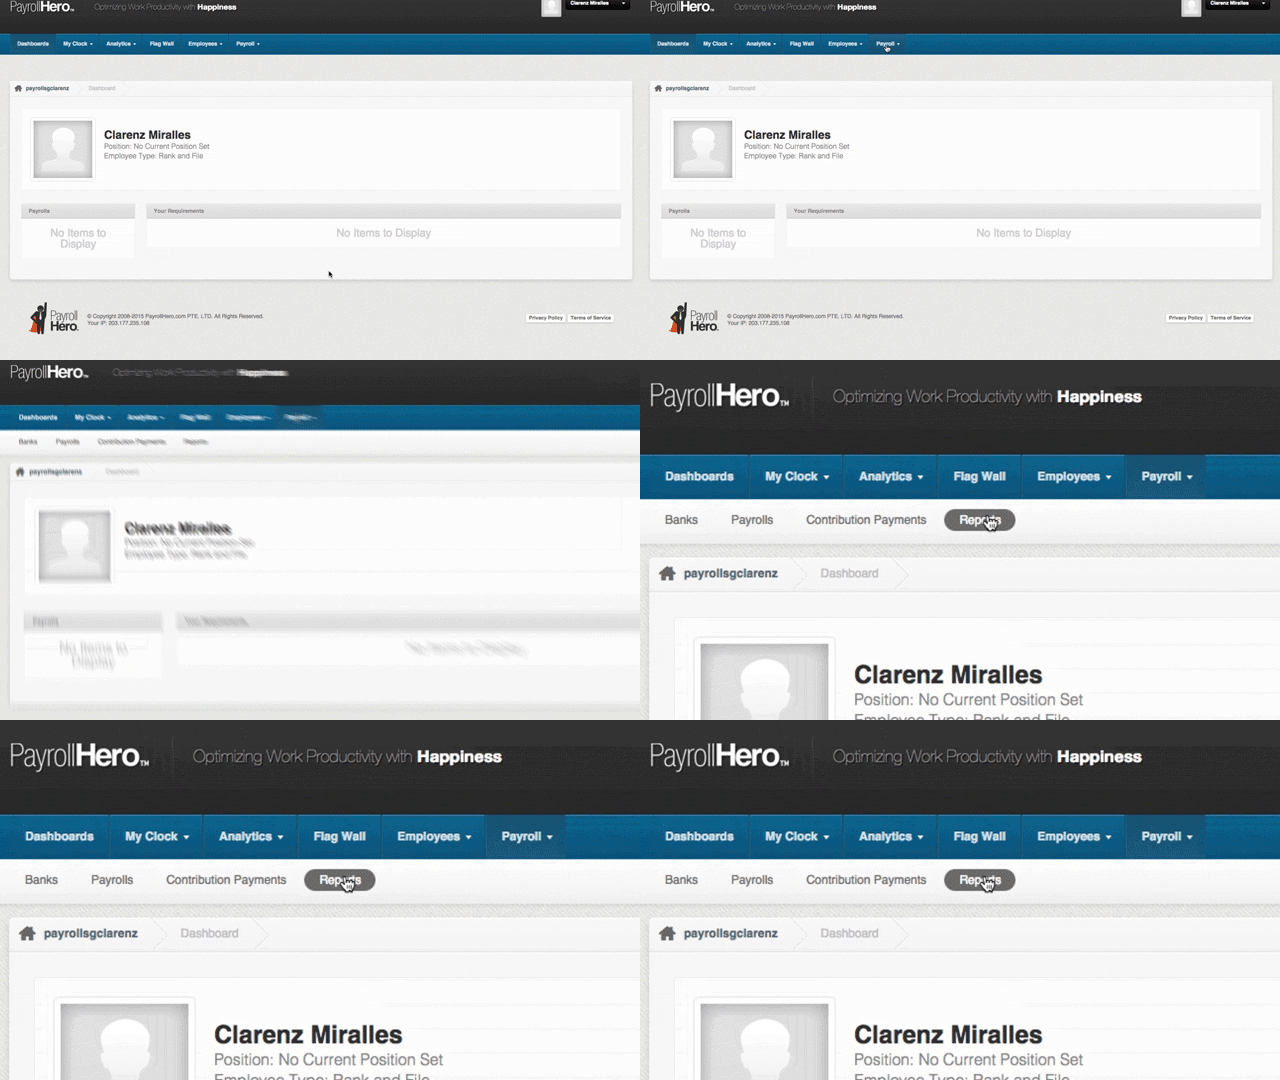
1. Go to Payroll, and click on Reports:
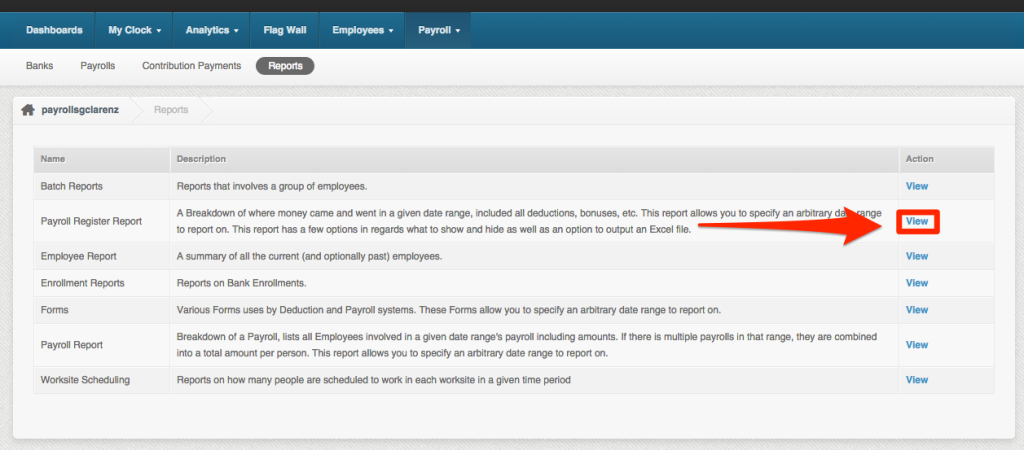
2. You’ll be greeted by the many Payroll Reports that you can run. Locate “Payroll Register Report” and click on “View”
3. Choose the parameters for the report.:
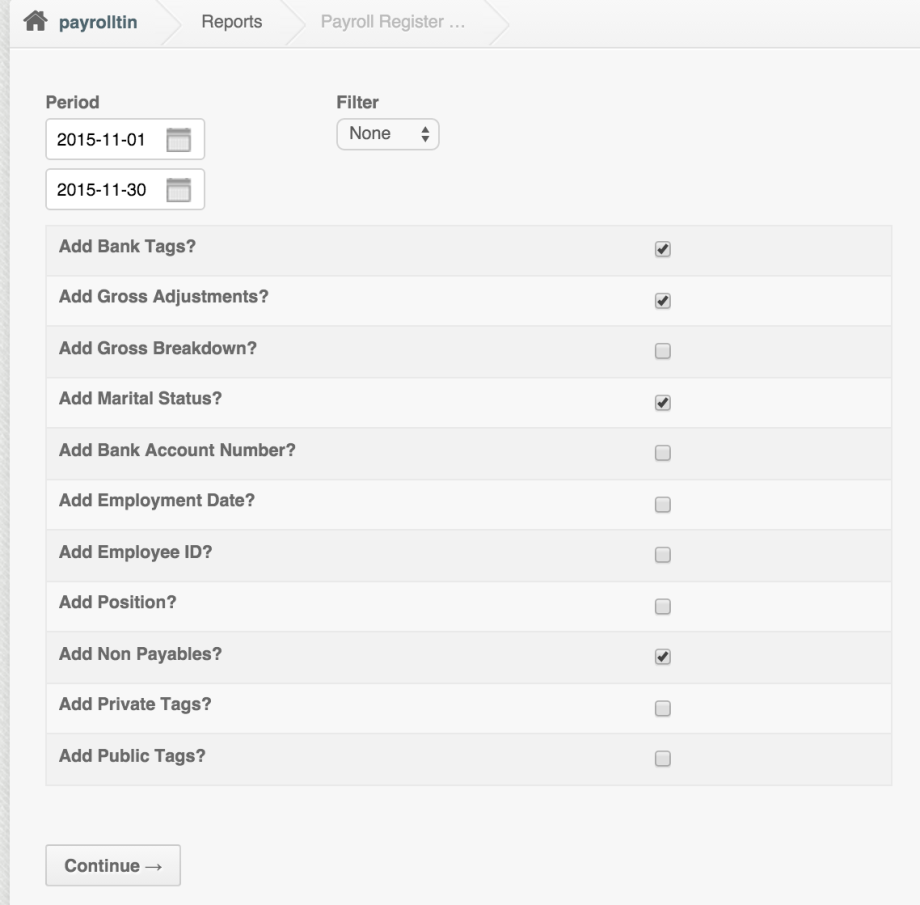
- In the Period boxes, specify the dates that you would like the report to run from and to
- Below that, tick the boxes next to the items you would like to be included in the report.1. Bank tags are what’s used to pull the data from the “Banks” page to the Payroll Register sheet.
2. Gross adjustments are also part of the payroll amounts, this should always be checked.
3. Gross breakdown, includes all items in gross including the hours and amount for the OT, ND, UT, holidays etc.
4. Marital Status – shows the marital status of the employees which can be updated on the Employee Profile. This is currently not related to the employee’s dependents. If you would need to update the employee’s dependents for the BIR Withholding Tax, it can be done via the BIR Enrollment on the employee’s enrollment page.
5. Bank Account Number – shows the account number of the employee’s bank. This can be updated via employee’s enrollment page.
6. Employment Date – shows when the employee started with the company. This can be updated via the employee profile.
7. Employee ID – shows the employee’s employee ID/number. This can be updated via the employee profile.
8. Position – shows the employee position that can be updated on the employee’s position page.
9. Non payables – shows the employer’s contributions at the end of the spreadsheet. If this is unchecked, then it will not show any details.
10. Private Tags – if you have created a tag only you can see, and you’d like to show this on the payroll register, feel free to just tick the checkbox.
11. Public Tags – shows the tags to where employees are assigned.
4. If you would like to filter the payroll register by tag, click on the drop down under “Filter” and select “By Tag” then select the tag.
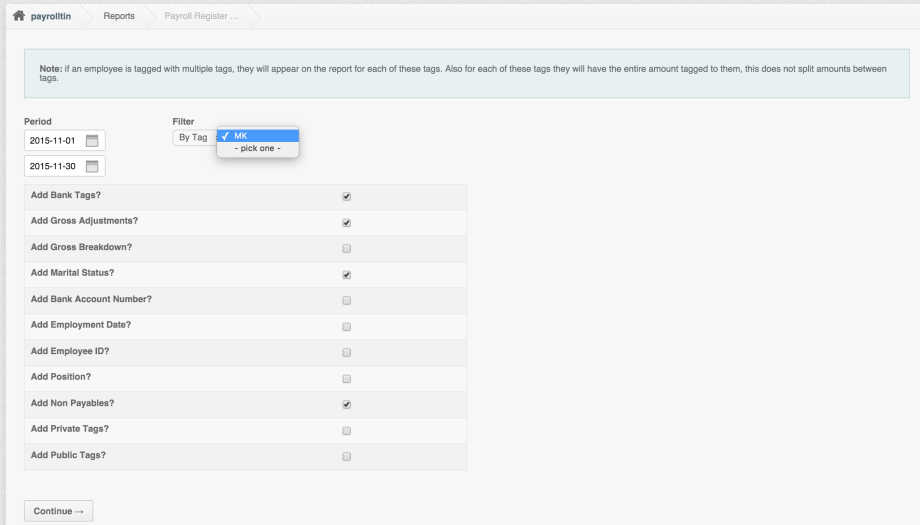
5. Once you have selected the options you need, click the Continue button.
6. It’ll open a page that tells you that the link to the report will sent to your email:

Tip: If you cannot find the email on your inbox, please look under your spam box.
When you open the file it should look like the example below
(Click on image to increase size)
If you export the payroll register with no items checked, it will look something like this:

If you export the payroll register with only “non payable” checked, will look something like this:

(open image in a new tab for better resolution)
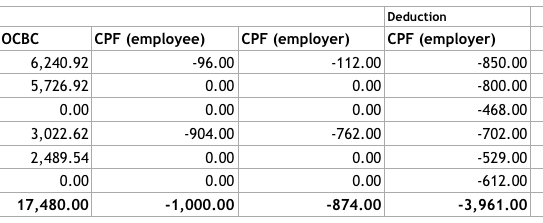
For Singapore accounts, We have added extra information to the CPF items in the Payroll Register Report to make it easier to tell the employee and employer CPF items apart.
That concludes the ‘How to export your employees payroll register’ article. You should now be able to find the Reports page and export your employees payroll register, confidently.
If you have any further questions, email us on support@payrollhero.com – we’d be happy to help.

