Skip to the next step by clicking here
Note: If you are a smaller company where one person is going to be administrating the entire account you can skip this step. However, if you do have supervisors or managers you should set this up
Subordinates are employees under your authorization or under your management. You’re in charge of your subordinates because you are their leader.
There are 4 things to set up when you want to assign subordinates to managers/supervisors/team leaders in PayrollHero.
1. Positions
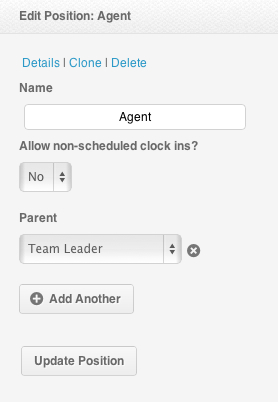
Make sure that the employees under the team leader has the correct parent hierarchy on the organizational Chart of the company:
- On the Settings page,
- Click on Positions (of the employee)
- Under “Parent”, select the team leader’s position and update.
2. System Permissions
Now that you have set up your Positions hierarchy in your organizational chart. Next, you will need select how much access you want to give them to manage their employees. In payroll hero we do this by assigning them to a predefined set of system permissions. For example you might want them to resolve attendance issue.
- Go to your Settings
- Click on System Permissions
- Create a new system permission
- There are 3 categories
- System Permissions (Access to settings)
- Global Employee Permission (Access to ALL employees)
- Subordinate Employee Permission (Access to subordinates/teams or anyone who is under you)
- And then click Create/Update the system permission
- And that’s it!
Now that you have created your “Team Leader” system permission, you would need to go over the team leader’s profile, edit their profile and change their system permission from “Regular Employee” to “Team Leader”.
3. Tags
Now that you have set up their positions and system permissions, we need to create a tag to group the Team Leader and his subordinate together.
- Click on the Employees tab
- If all employees are on the system already, great. You can then start creating tags.
If not, please make sure to add all your employees first. (Here’s a KB how) - On your Employee List
- Create a tag either using the right or left tag box.
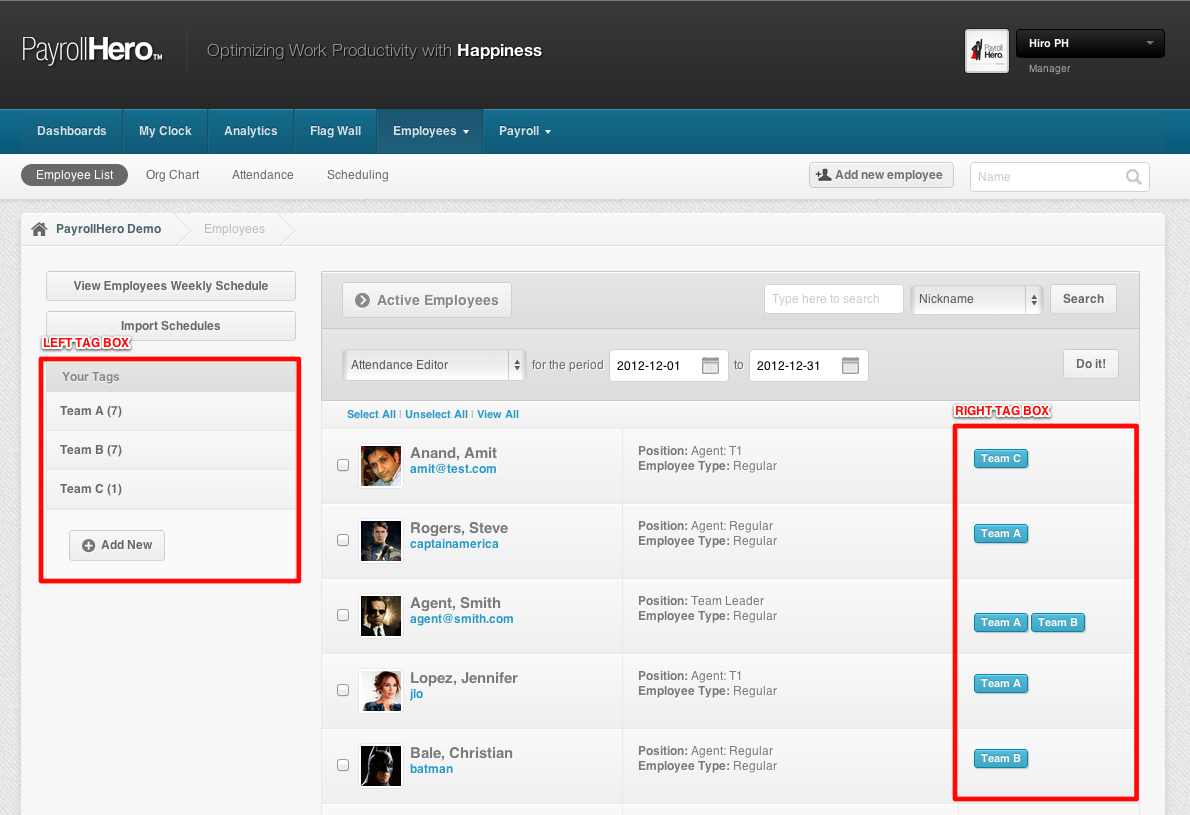
- The tag should include all the team members and the team leader. You can add as many team leaders there is on a tag.
- If a team leader has 2 teams, then add his name on the tag on both teams. This way he can manage both as well.
Click Here for more info on how to Tag Employees.
4. Subordinates
Now click on the team leader’s profile
- Click on the “Subordinates” page to see this:
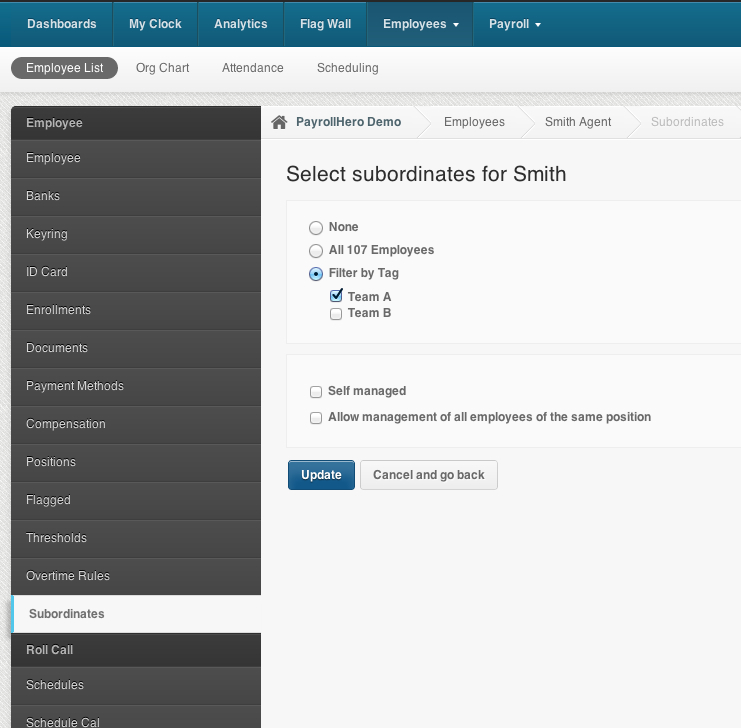
- The subordinate page is where you’ll have the option to give your team leaders access to their teams. It can either be to all employees, or to a specific tag.
- “Self Managed” means that if you are giving the team leader access to manage himself. He/she can then create and resolve their own schedules.
- “Allow management of all employees of the same position” means that the team leaders can manage all team leaders or all position same as his.
- Once you’re done, click on Update and that’s it!
Next Step: Resolving Attendance
Congratulations, your team are now set up on your account and will be able to manager their employees correctly.
![]()