The main function of the Keyring feature is to provide you with a running checklist of items that have been given to, or revoked from, an employee during the course of their employment or upon termination of their employment.
As an employer you have the ability to add items of responsibility to the PayrollHero profiles of your employees. These items are called Keyrings and can be any item or document that you have entrusted to an employe as part of their job.
Some examples of items to track on the Keyrings are:
- Company email accounts
- Key holder agreements
- Locker usage access
- Uniform
- Company car keys
- Software license
- Mobile Phone
In this article we’re going to show you:
- How to access an employees Keyring page
- How to add Keyrings to a profile
- How to remove Keyrings from a profile
1. How to access an employees Keyring page
To access any employees Keyring page:
- Log in to your PayrollHero account.
- From the main Dashboard, click on the Employees tab.
- Click on the Employee List tab from the sub-navigation.
- Select the employee from the list to view their profile.
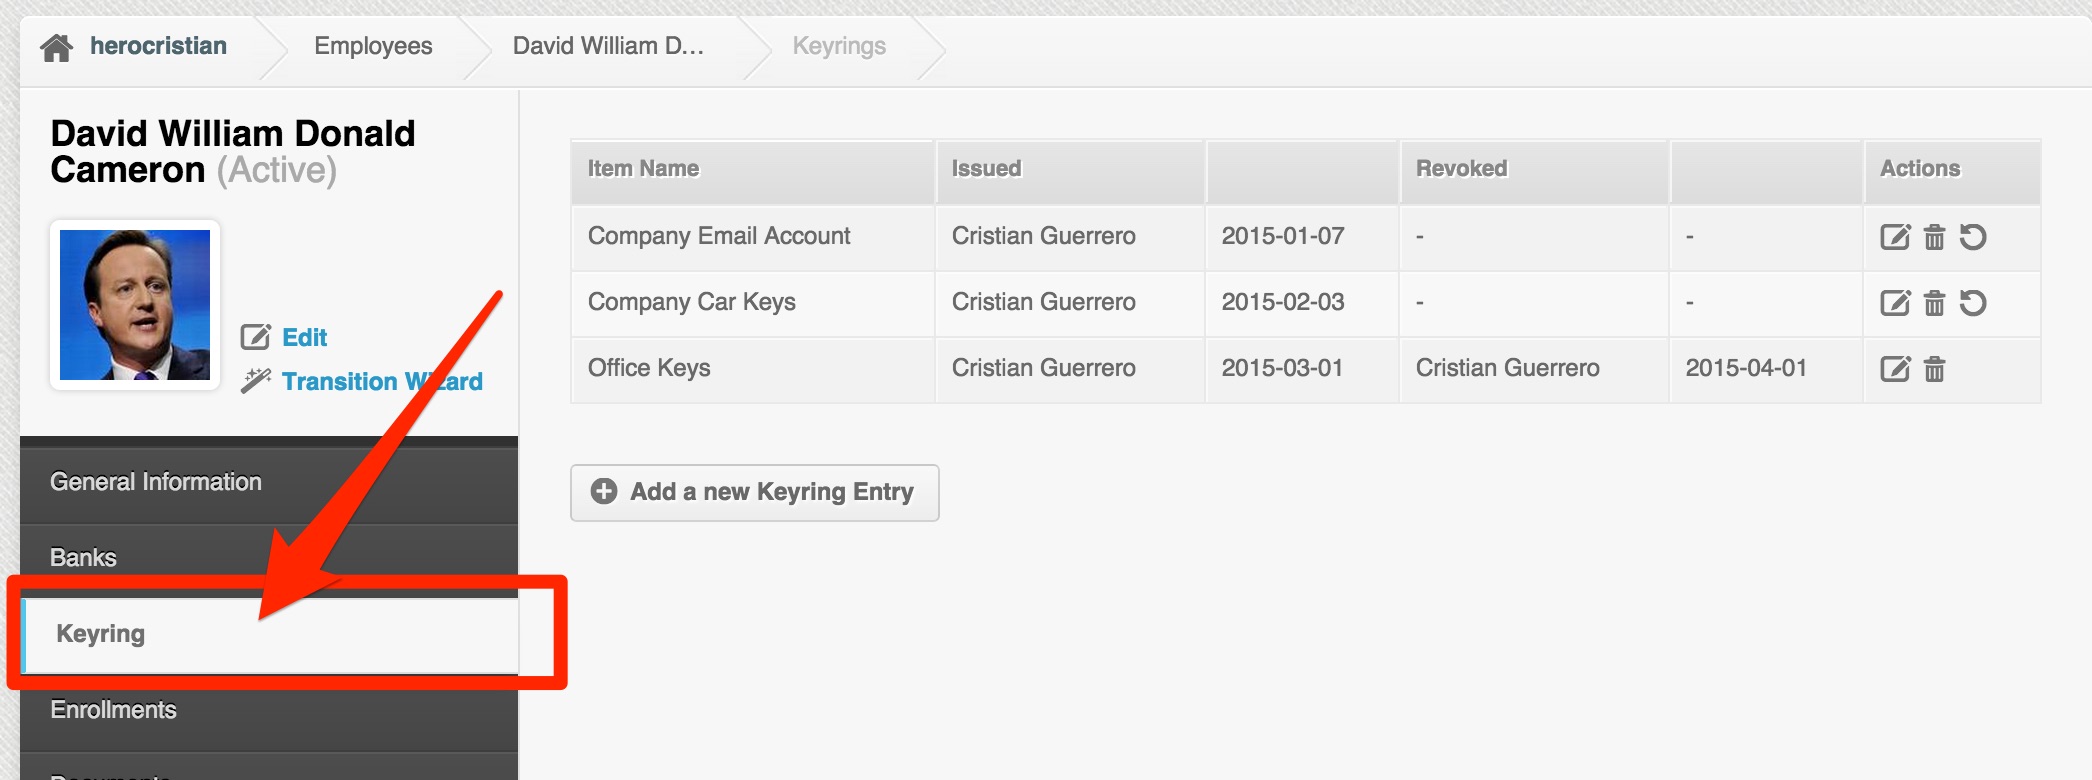
- On their profile page, click the Keyring tab on the left hand navigation and that will open the Keyring page
Example: Keyring page
2. How to add a Keyring to an employee’s profile
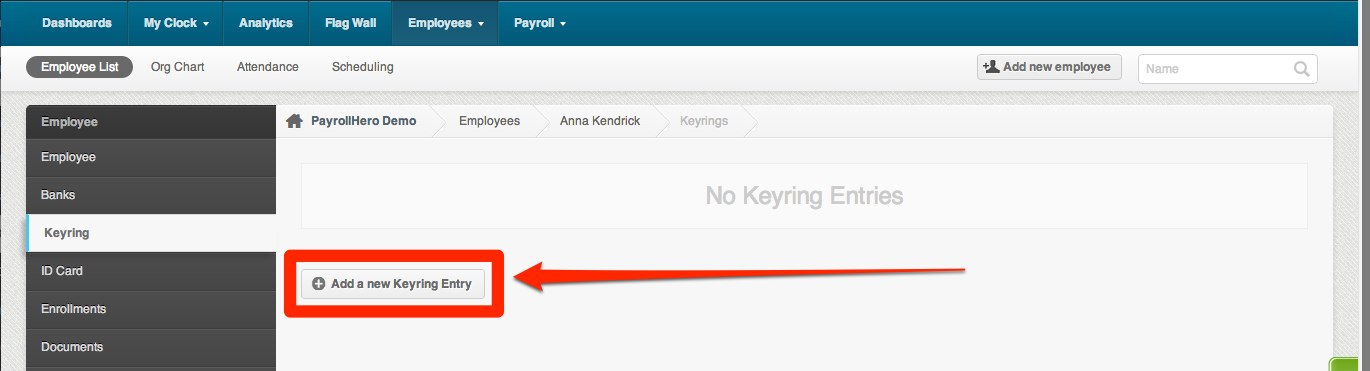
Once in the employees Keyring page:
- Click the ‘Add a new Keyring Entry’ button (highlighted below)
1. Add the name of the item (e.g. key holder agreement)
2. Write down who the item was issued by.
3. Select the issue date.
4. Click ‘Create’ when you’re done
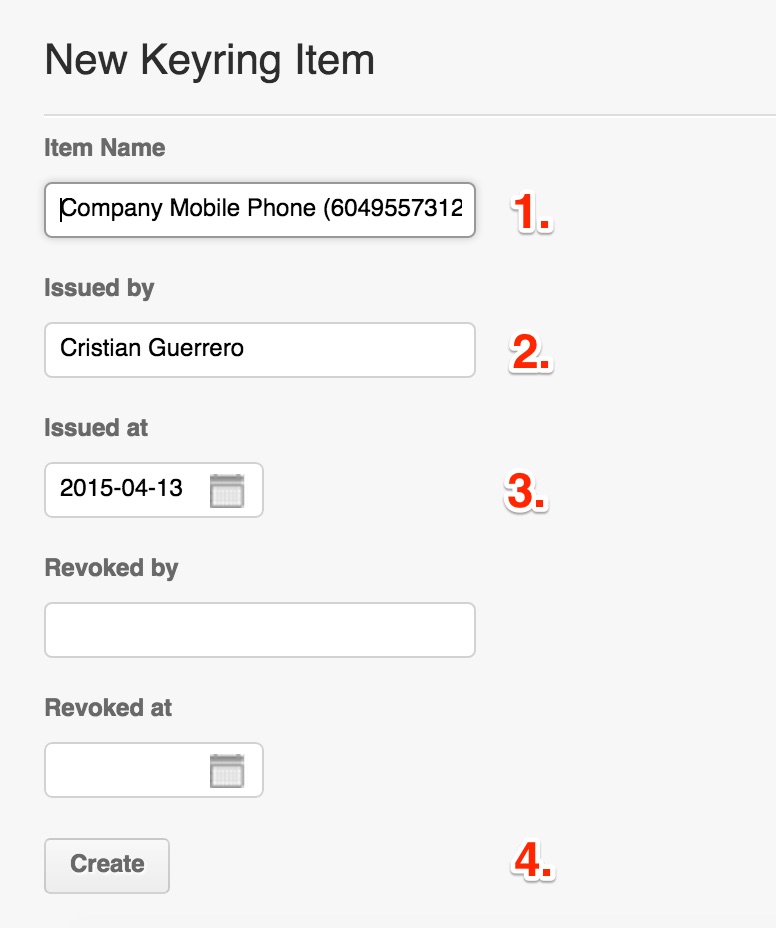
Important: You do not need to add anything to the ‘Revoked’ boxes when you are adding a keyring.
3. How to revoke a Keyring from an employee’s profile
Inside the employees Keyring page, each Keyring created for that employee will listed on this page. If you want to revoke an item:
1. Find the item that you wish to revoke
2. Click the circular arrow button on at the end of the row
Tip: When you hover over the button with your cursor it will say ‘Revoke’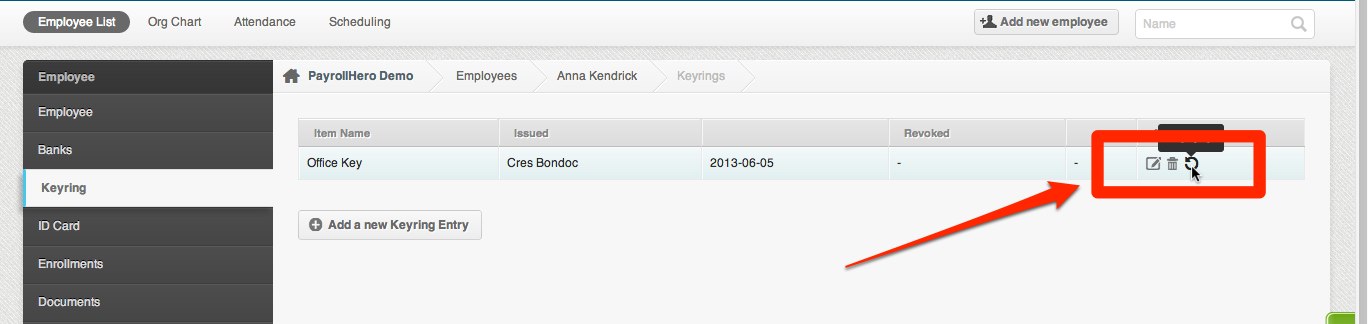
3. When you click the ‘Revoke’ button a confirmation window will open
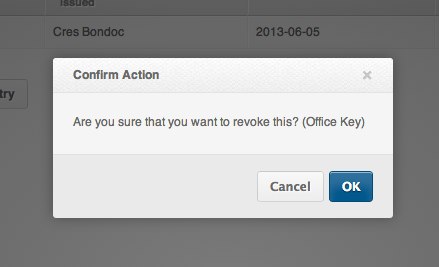
4. If you are certain you want to revoke the selected item, click ‘OK’ to confirm.
Tip: The name and date fields will automatically be filled with the information of who revoked the item and when.
You will be taken back to the Keyring page, where you will notice the revoke button has now disappeared. 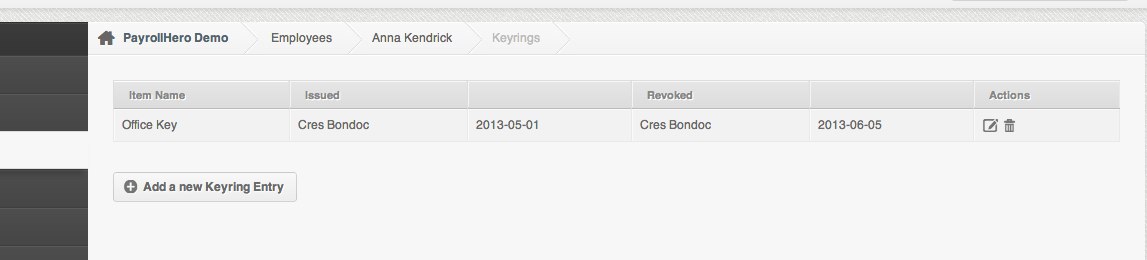
What if you revoked the wrong item and now want to reissue it?
Next to where the revoke button was before, there will be two other buttons: a delete button and an edit button.
1. Click the ‘edit’ button, this will take you back into that Keyring details.

2. Remove the name information from the ‘Revoked by’ box
3. Remove the date information from the ‘Revoked on’ box
4. If you’re certain you want to reissue this item, click ‘Update’
Important: You can revoke this item again in the future by following the same steps used earlier in this article
That concludes the ‘How do Keyrings Work?’ article. You should now be able to find the Keyring page, add Keyrings and revoke Keyrings, confidently.
If you have any further questions, email us on support@payrollhero.com – we’d be happy to help.