If you are setting up a “Cash Advance or Loans” for a small group of employees.
Here’s what you need to do:
A. Bank
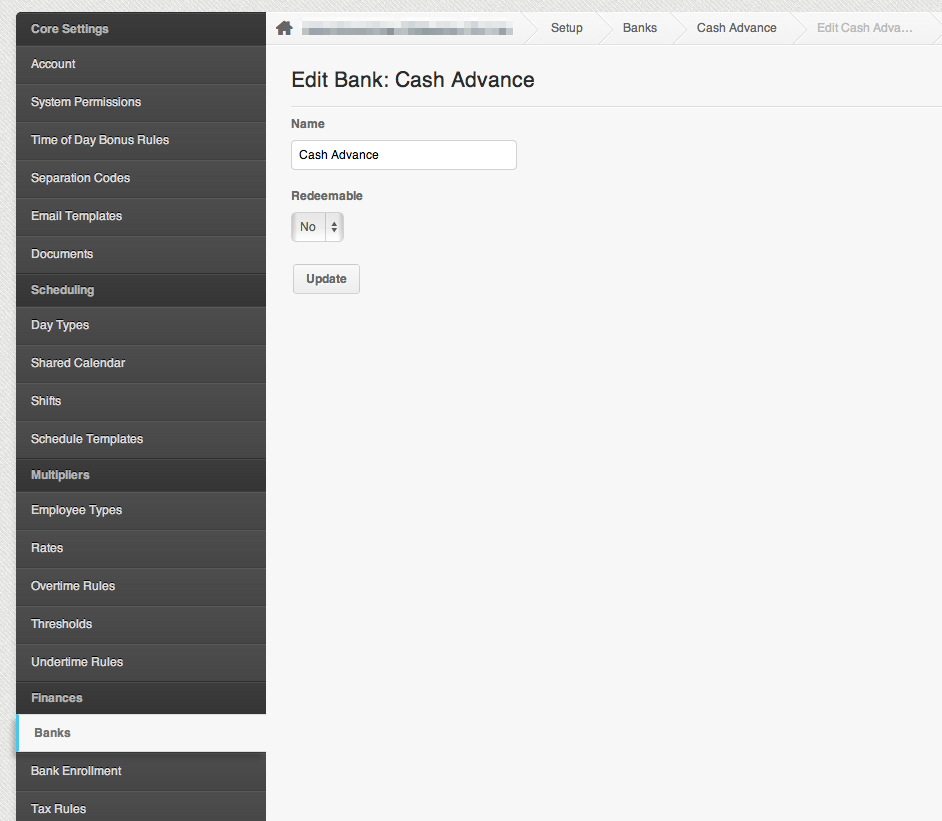
Bank is where you can keep track of the debit/credit for the cash advance.
- Create a bank for your cash advance or loans.
- Click on Setting
- Click on Banks
- Click “Add a new bank”
- Type in the name that you want, it can be anything “loans, cash advance, advance, etc”
Here’s a screenshot:
– Click on “Create” once you’re done.
B. Bank Enrollment
Bank Enrollment is where we setup the date to when we’ll activate the payment.
If you only need to create loans or cash advance to a few employees, you can skip adding the bank enrollment and just go directyl to the creating the payment on the employee profile (See letter C).
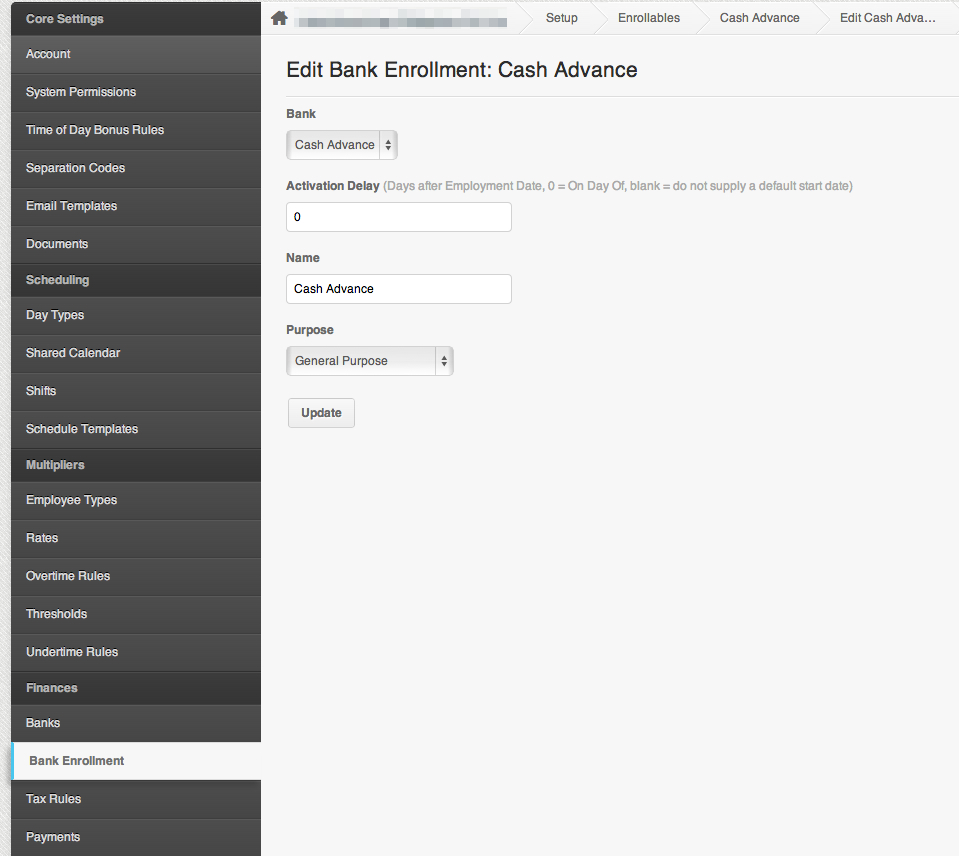
Now that you have added a bank, the next thing that you need to create is the “Bank Enrollment”.
- Click on Setting
- Click on “Bank Enrollment”
- Click “Add a new bank enrollment”
- Select the ‘bank’ you created
- Set the “Activation Delay” to ” 0 “. This means that the payment will start on the specific date that you have setup on the “Enrollments” page under employee profile.
- Name the bank enrollment
- Set purpose to “General Purpose”
Here’s a screenshot:
C. Payments
Any payment you create under settings, will shows to all employees’ payments page.
However, the payment will not be enabled to the employee unless there is an enrollment set to the employee profile.
The “Enrollment” is where we add the start date for the payment.
If you did not create bank enrollments, go to the employee profile and create the payment under the “Payments” page.
- Click on Payments
- On the “select payment kind” drop down list, select “Advance”
- Click on “Add a new payment”
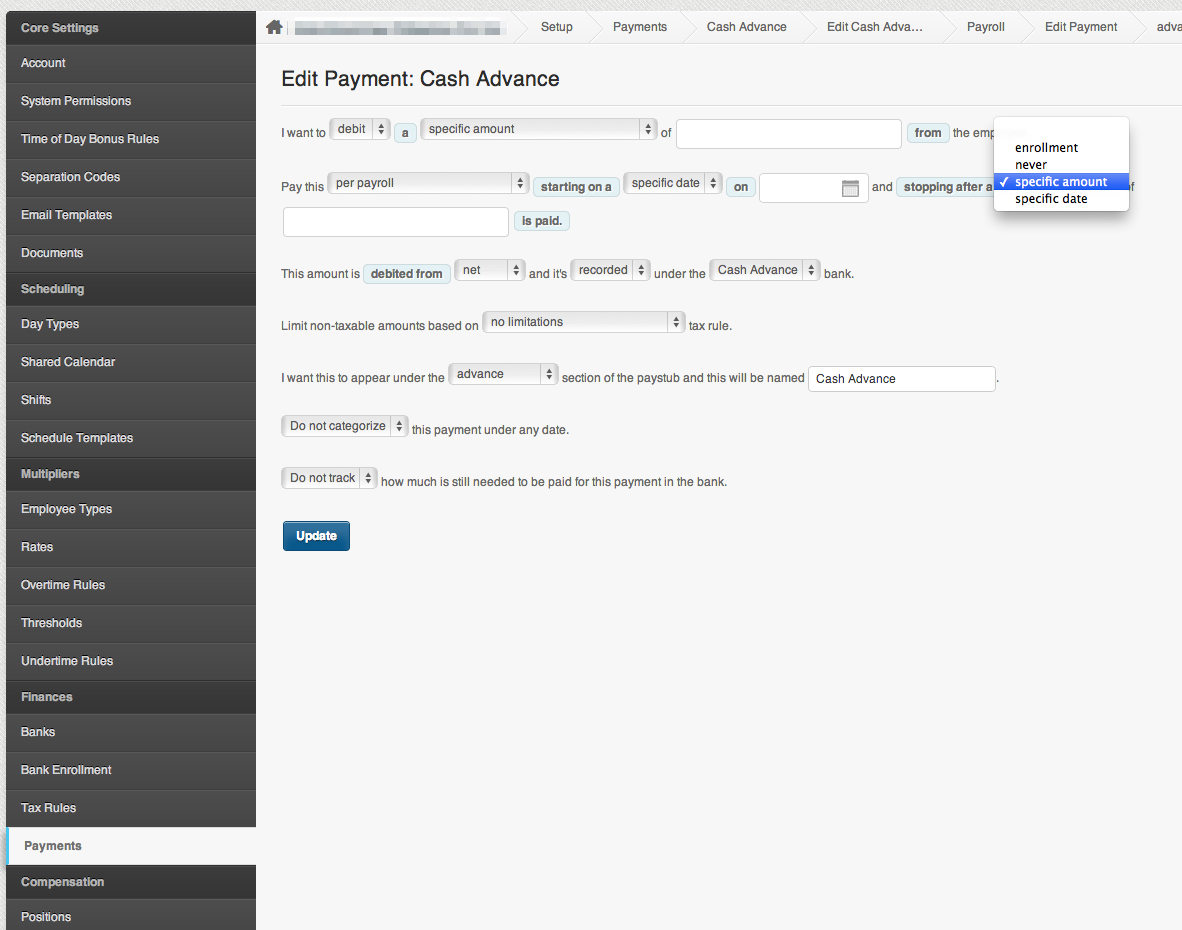
- Choose “Debit” if you are setting up a loan.
- Type in the “specific amount” – this is how much amount you would like to deduct the employee.
- Choose “Per Payroll” and select a “specific date” on when the payment should start.
- You can opt to choose to end the loan by selecting a “specific amount” or a “specific date”
- If you choose “Specific amount” the loan will automatically stop, once the employee reached the amount>
- If you choose “Specific date” the loan will automatically stop on a specific date.
- The loan should be debited from “Net” and is “recorded” under the “Cash advance” bank.
- Set a name for the loan/cash advance.
- And click on “Create”. See screenshot below:
SAMPLE SCENARIO
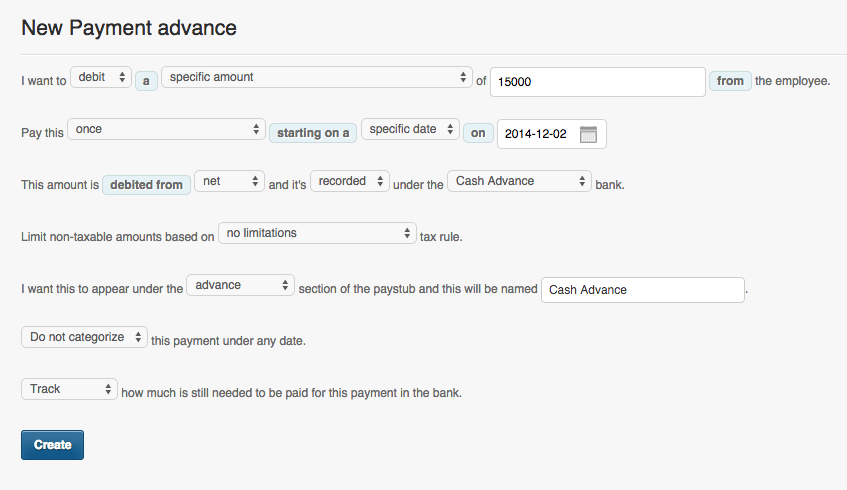
If you are initially creating a “cash advance” for an employee and later the employee would have to pay for it as a loan. You would need to create two payments here:
- One for the cash advance where you use “Credit” so the employee gets paid the amount and then set it to be paid “once”. See screenshot below for a sample cash advance setting:
- And the other payment is for the loan where you use “Debit” so they get deducted a specific amount and add the total amount that you gave them for the cash advance so they get deducted per payroll. See screenshot below for a sample of a loan setting:
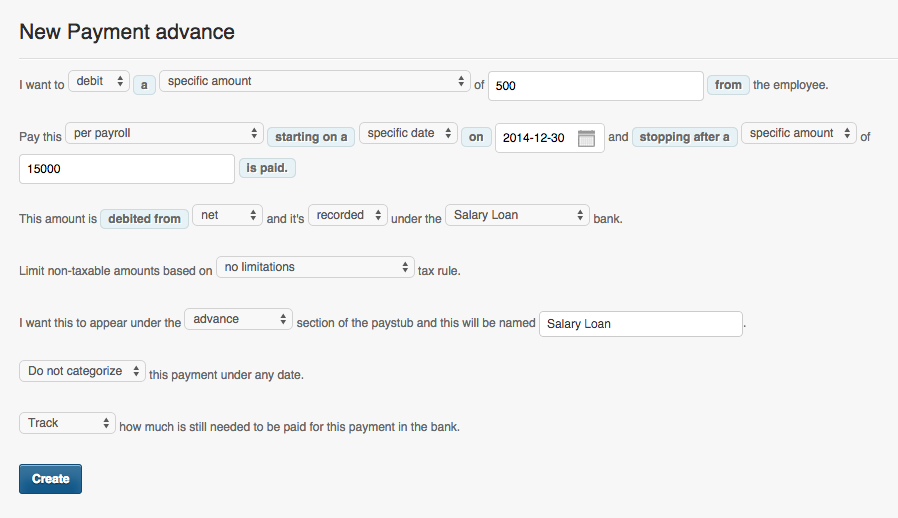
* If you use “specific date” instead of specific amount, what this does is that the payment will deduct 500 pesos til it reaches the end date.
D. Employee Profile > Enrollment
The “Enrollment” is where we add the start date for the payment.
Now that you already have the payment on all employee profile, the next thing to do is add a specific date under “Enrollments”
- Click on the Employee List
- Click on the name of the employee who has a loan/cash advance.
- Click on “Enrollments”
- Click on “Add a new enrollment”
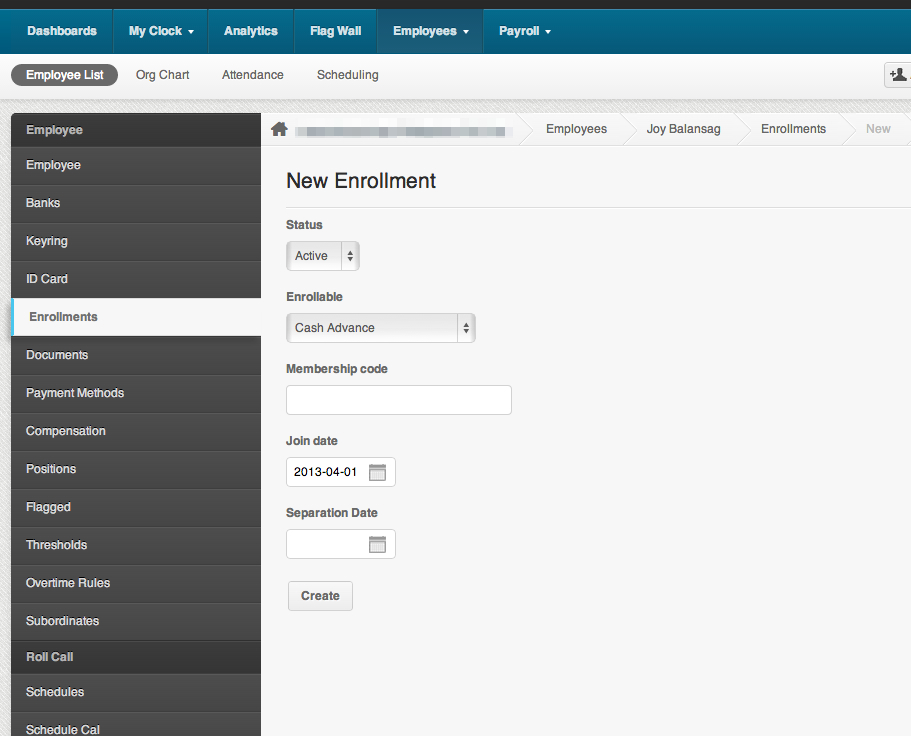
- Select the status as “Active”
- Choose “Cash Advance” (or whatever name you have chosen for the loan/advance) for the enrollable
- Skip the membership code
- Add the Join Date – The “Join Date” is the date on when the payment will start.
Click on “Create”
And that’s it! Once you generate payroll, the loan will be deducted to the employee depending on when the start date is.

