The multi insert tool can be used to create multiple schedules on the PayrollHero system. It is the most time efficient way, and we recommend using this when you have to assign schedules to a lot of employees. The system automatically generates a bespoke template for you to complete. It is designed specifically for your company and its settings. This article will explain how to use the feature.
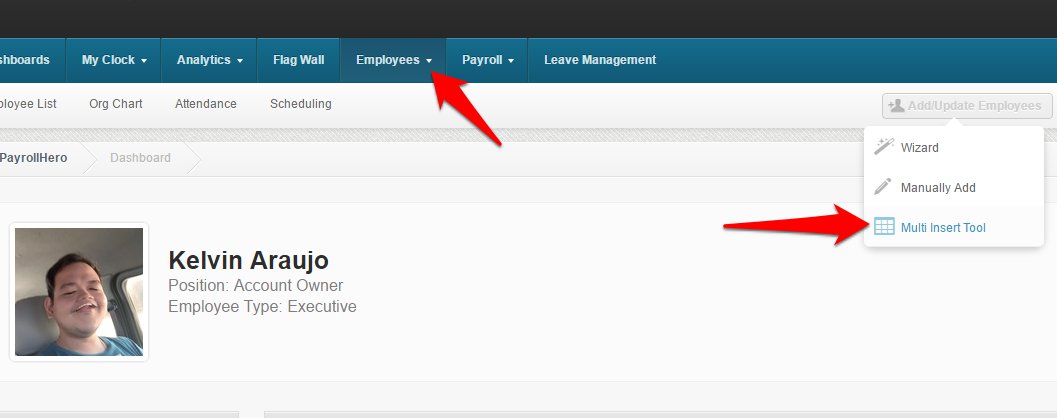
1. Click on the Multi Insert Tool
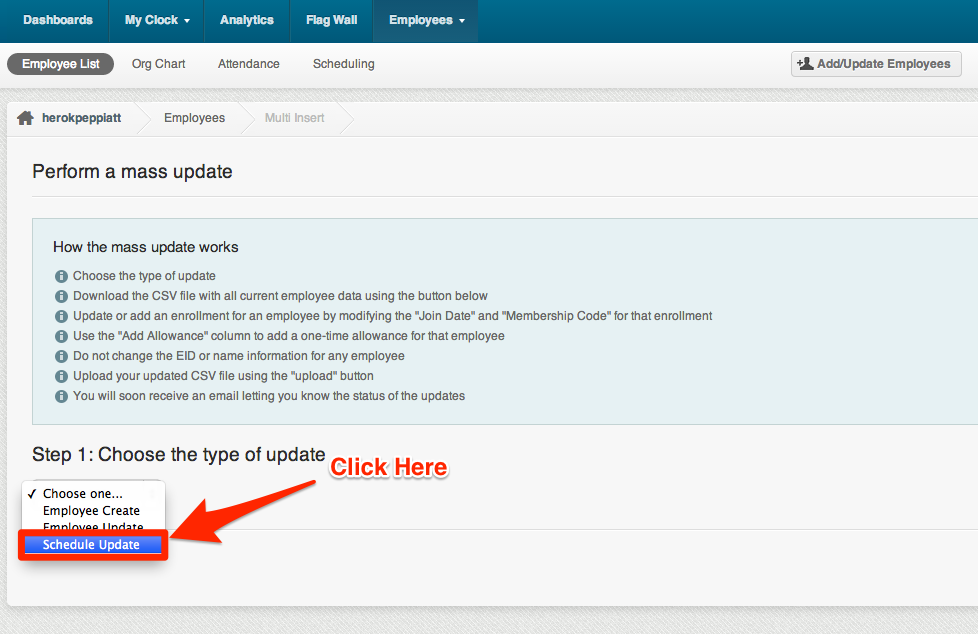
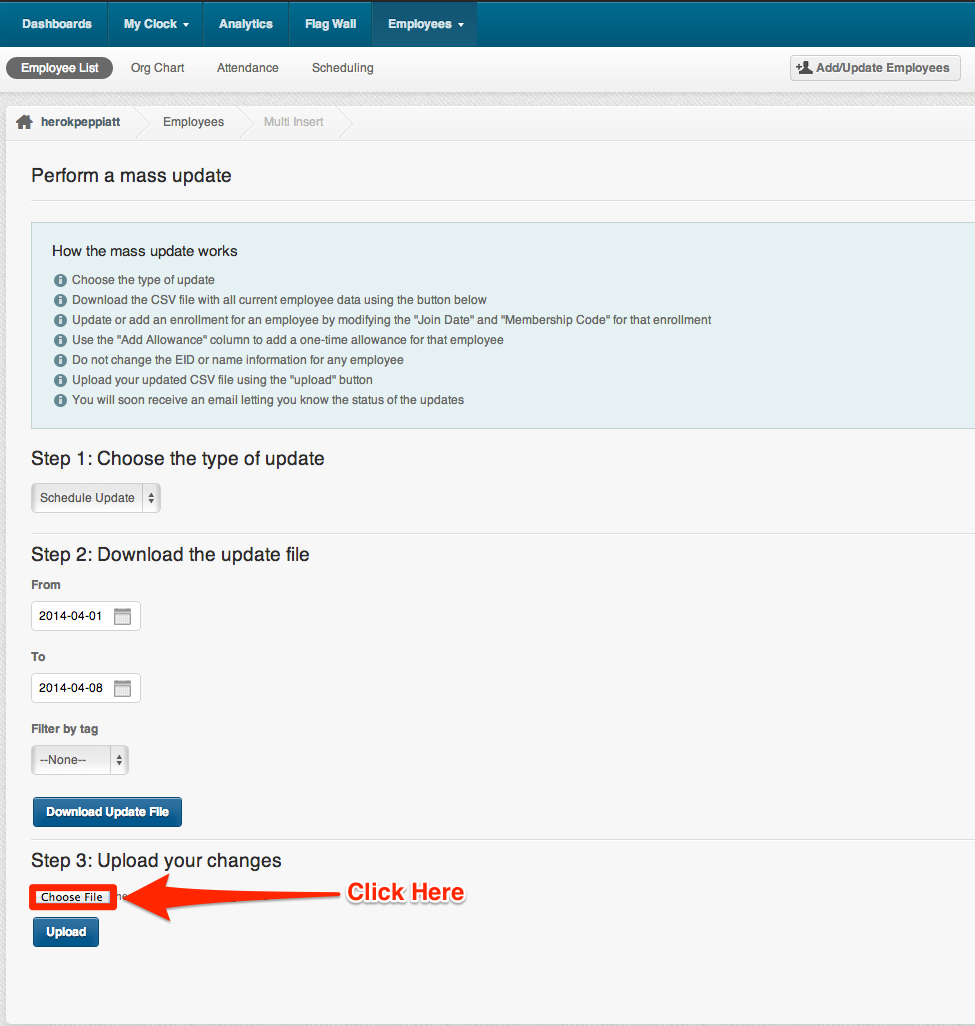
2. Choose “Schedule Update” for the type of update
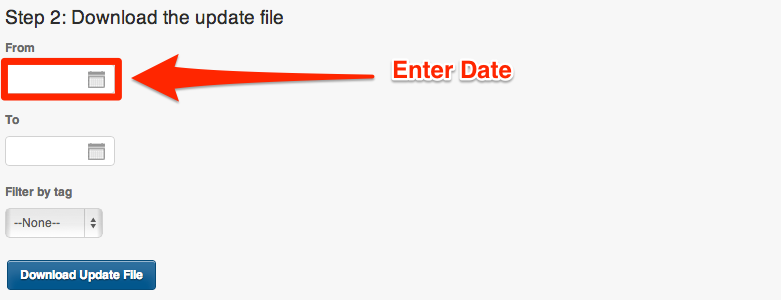
3. Enter the schedule period you want to edit
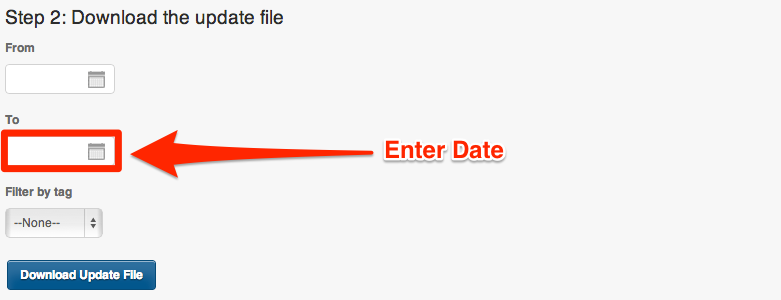
Enter the “To” date
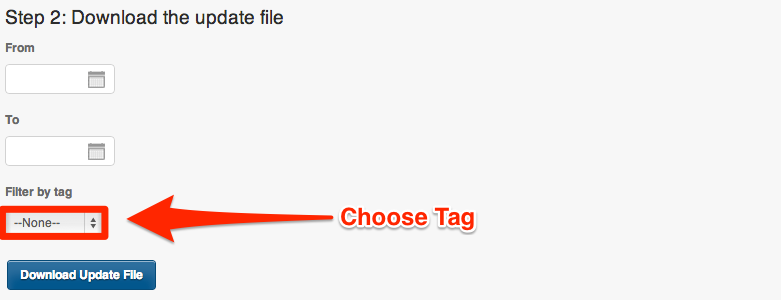
(Optional) You can also filter by tag. this allows you to only assign schedules to employees who have this tag.
4. Then click “Download Update File”
5. Now open the downloaded file in your spreadsheet software, but keep the Multi Insert Tool page open
The file name will be yourcompanyname_schedule_update_form_YYYY_MM_DD.xls
If you don’t have spreadsheet software download OpenOffice – https://www.openoffice.org/
6. Input each employee’s schedule on their corresponding row
The Legend shows you the correct format for entering dates
The sheet includes the Employee ID, Name, Position, Date of the Shift with the Unpaid Breaks and Worksites
7. Once you have entered all of your employee’s information save the changes to the spreadsheet
8. Now go back to the Multi Insert Tool and upload the updated spreadsheet
This button might look different on a windows computer but the process is exactly the same.
9. Click 
If the upload was successful the message below should appear at the top of your screen
If you are using google chrome right click on this image and press “Open Image in a New Tab” to make it bigger.

