There are 3 ways to add a schedule to an employee profile
1. Schedules page
– Used for plotting schedule in a long period of time
- Choose a start date

- Click on “Add a new Schedule” or if the employee has an old schedule, edit the old schedule and then choose an end date, then add a new schedule.

- On the Employee Profile, click on “Schedules” on the sidebar.

- Select an End date
– It’s highly recommended to leave the end date as “Do Not End” and just add a new schedule if there will be some changes.
– Adding a new schedule will automatically end the existing schedule based on the new schedule’s start date.*When adding an end date, make sure to avoid schedule overlap. Set the new schedule start date the day after the existing schedule’s end date. - Select a schedule type
- Choose a Template
– You may select a pre-set up schedule template. You can check out how to create a scheduled template here. - Customize Schedule.

- Choose a Template
2. Shift Cal
If you want to change a schedule for just 1 day or two, this is where you can change it.
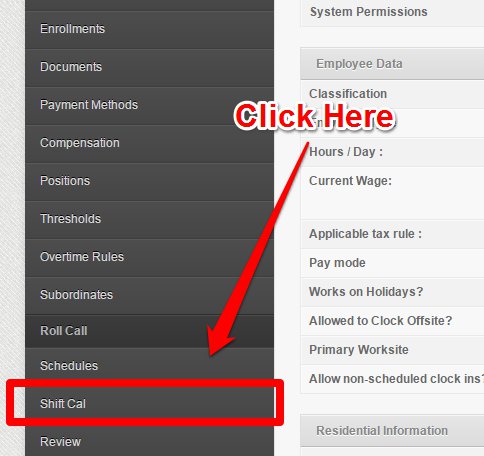
- On the employee profile, click on “Shift Cal”

- Click on the day that you want to change the schedule.

- A pop up window should appear. Click on “New Schedule” or Click to edit the existing schedule.
- You can either choose a shift or type in the new schedule.

3. Scheduling (Weekly Scheduler)
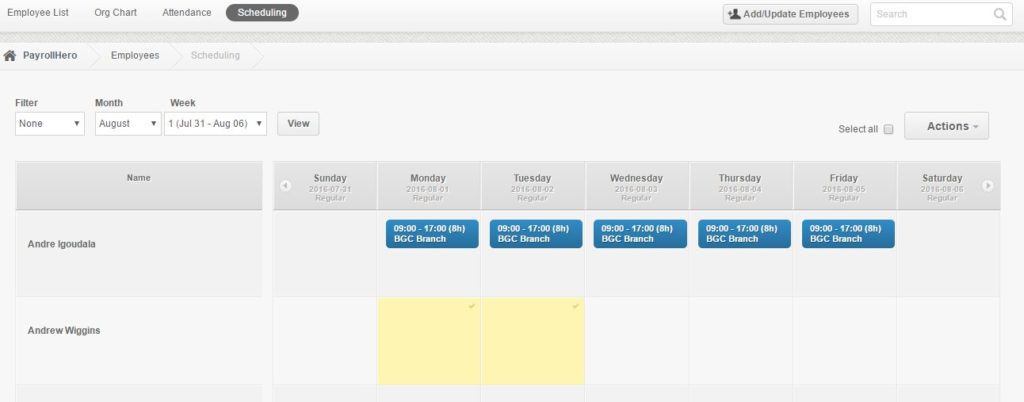
A weekly view of the employee’s schedule. You can edit/change a schedule using this feature as well.
- Click on the employee tab
- Click on “Scheduling”

- Click on the day you want to change/edit.

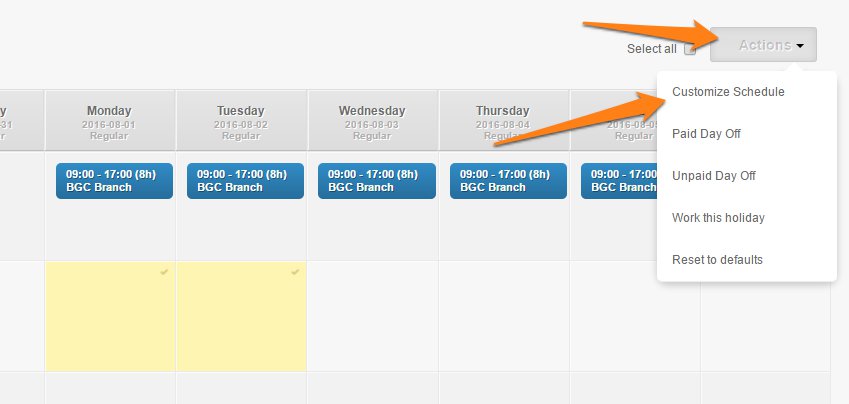
- Under “Actions” click on “Customize Schedule”

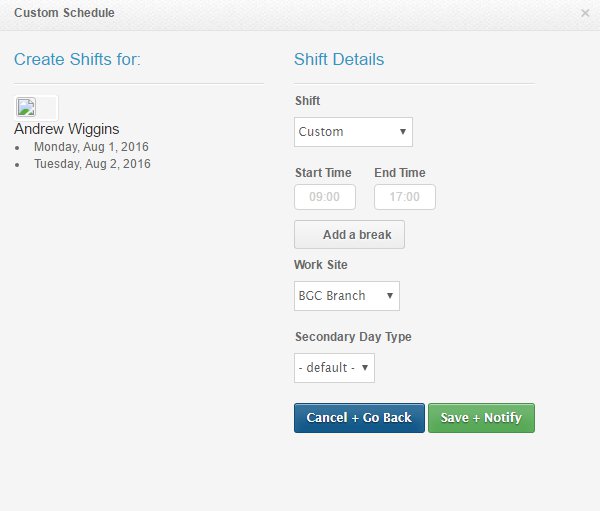
- The Shift can be selected in case employee will work on a pre-defined shift. If employee will work on a unique schedule, Select the “Custom” under Shift and set the start and end of shift.
*Use a 24-hour time table upon adding shifts
- Click Save + Notify once done.
If you have questions and suggestions, feel free to contact us at support@payrollhero.com.

