Skip to the next step by clicking here
Tags are how you organize employees on the PayrollHero system. You can create public (everyone can see them) or private (only you can see them) tags on the system. You can use them for organizing your employees anyway you want.
They can also be used for organizing your employees to decide who your managers and supervisors can see. We’ll cover that in the next section
Creating Tags
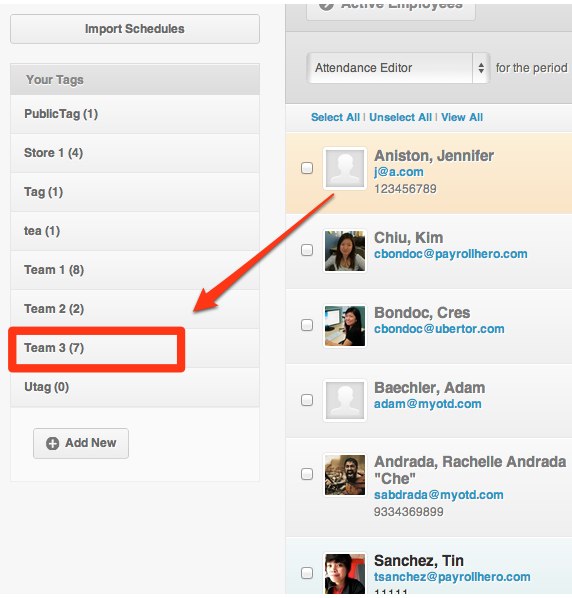
1. Click the Employees tab, then the Employee List
2. Click View All
Then click on Add New on the left menu.
3. Add a new tag name
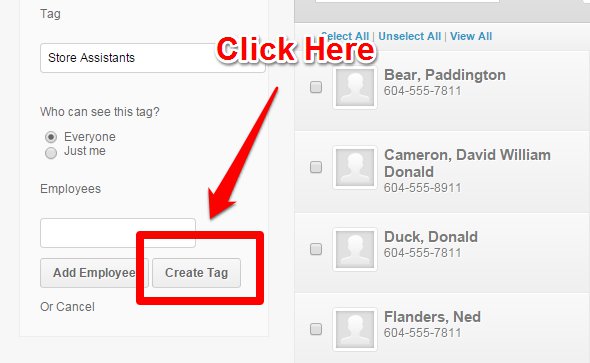
4. Click Create Tag
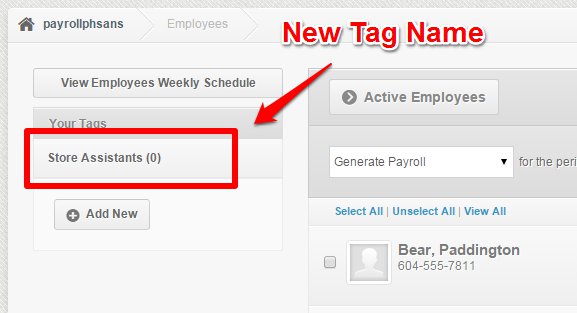
5. You can now view your new Tag.
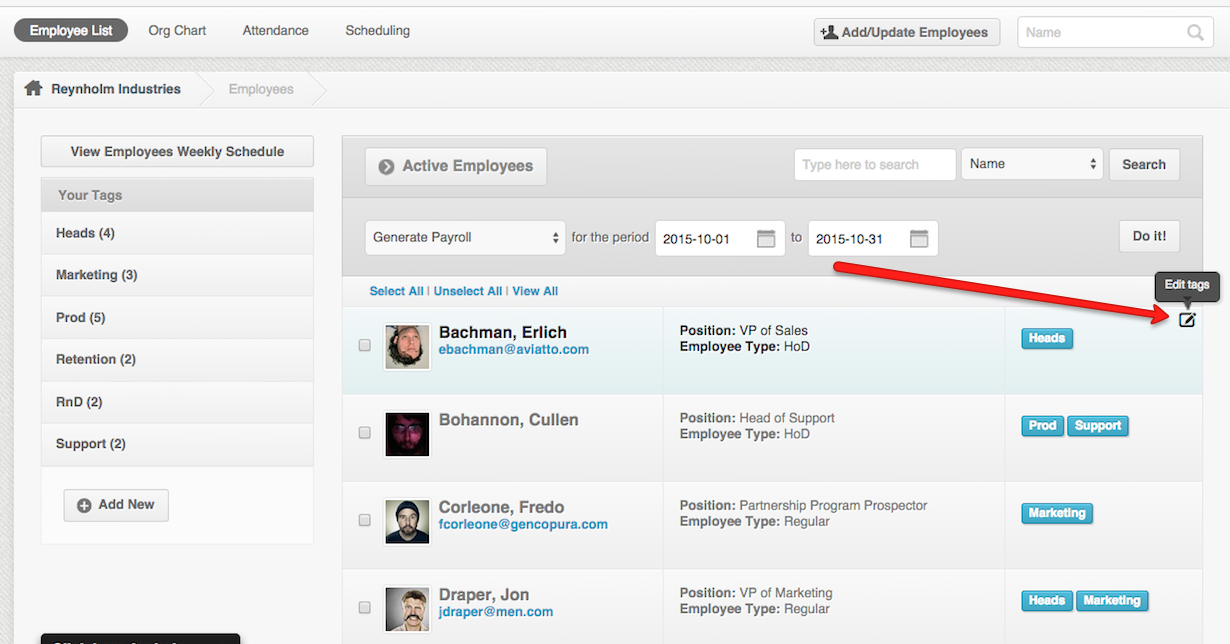
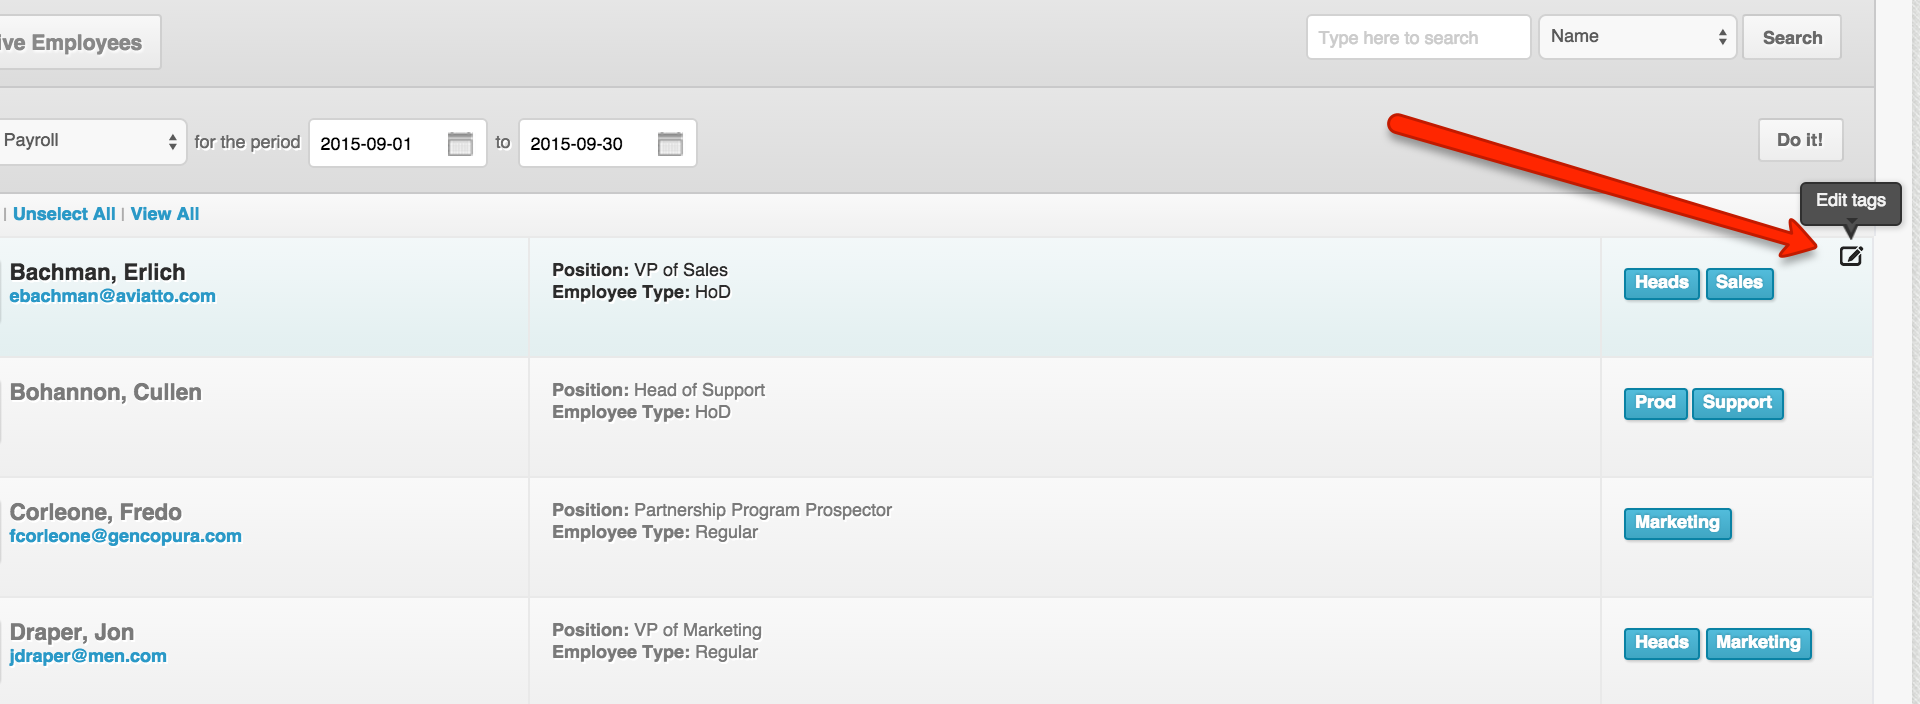
Alternatively, you can create Tags by clicking on the edit icon on the far right part of the employee.
Then type in the name of the tag,
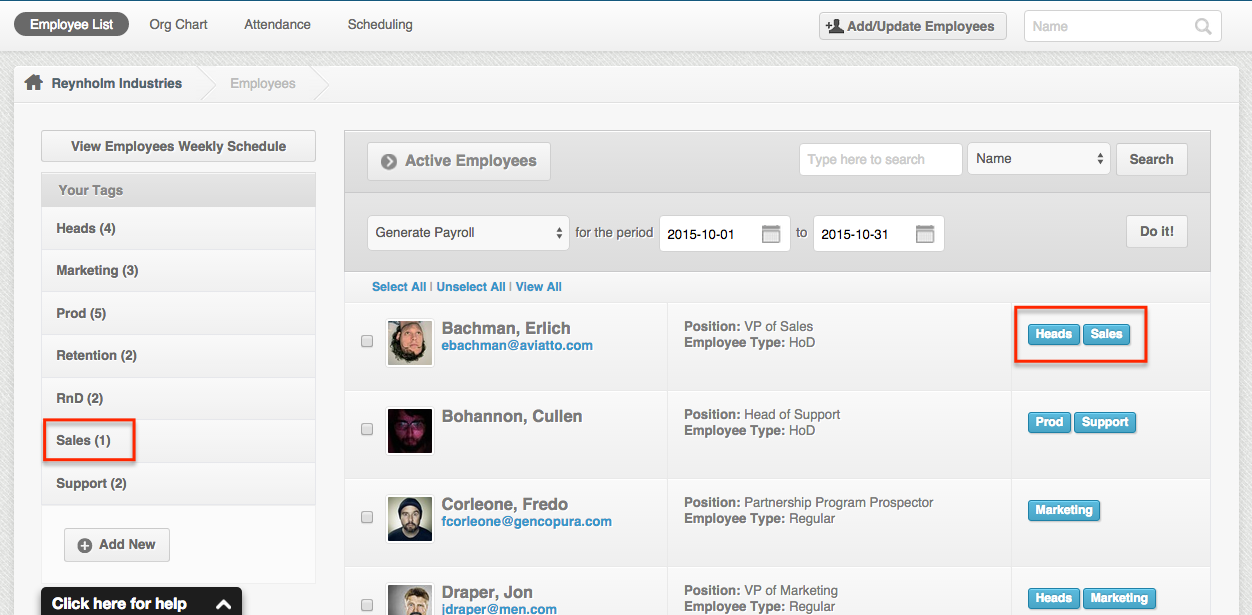
This would result to a tag being created for the designated employee.
How to Tag an Employee
1. Go to Employee List
2. Search for the Tag
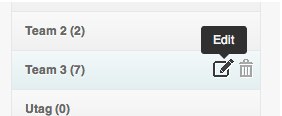
3. Click the Edit icon
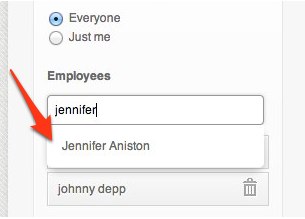
Tick the button if you want the tag to be viwed by everyone or just yourself. Then Type the name of the Employee that you need to add and click the automatically searched name that appears below.
4. Click Add Employee & Save
Alternatively, you can tag an employee by clicking on the edit icon on the far right side of the employee’s panel.
Then you can copy+paste or type in the name of the tag you want the employee to be a part of.
Once you click add tag, this would include the employee on the designated or assigned tag.
This could be very useful when editing multiple employees.
Next Step: Setting up Subordinates
Great you’re almost done organizing your employees! Nice work! Next we need to tell the system which employees are responsible for managing employees and who they are supposed to manage.


