There’s 2 options for removing shifts:
- If you have custom schedules created using the Scheduling (Weekly Scheduler) or the Multi Insert Tool – Schedule Update , you can remove shifts by clicking on “Reset to default”
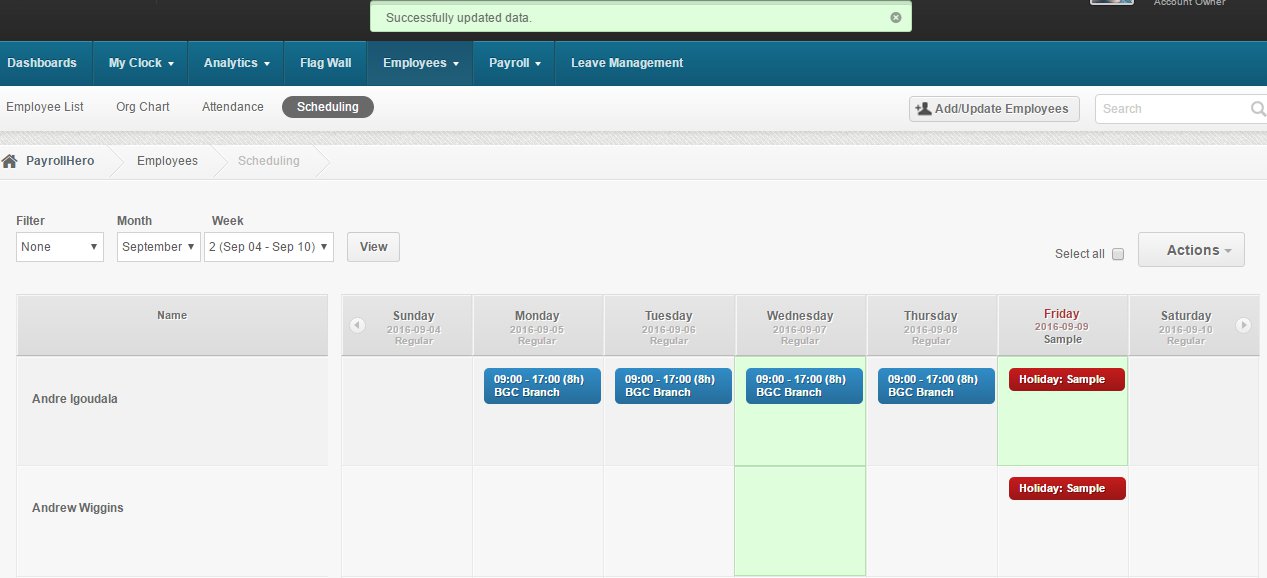
- Go to Scheduling Page

- Click the dates you want to reset to default

- Under Actions, click “Reset to Defaults”

- Once clicked, you’ll be notified of the changes and notice that the dates you selected are back to the default set up
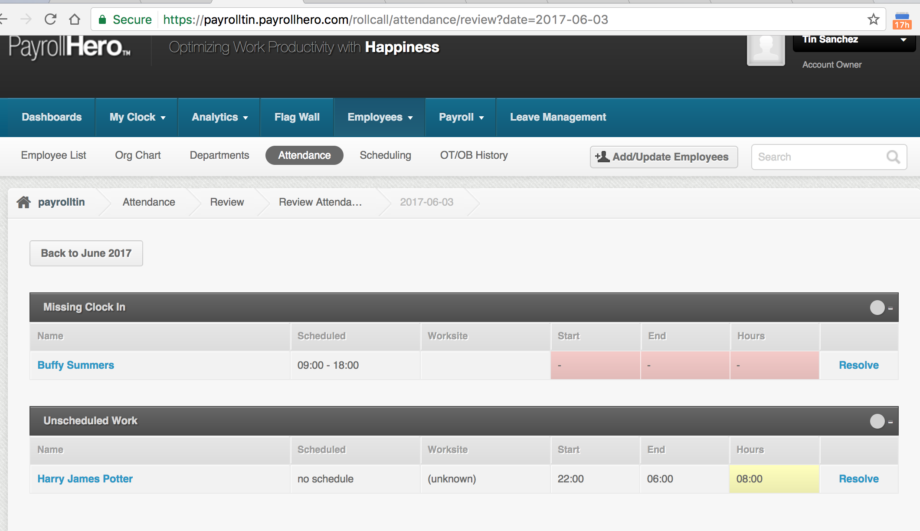
- If the employee has clocked in and out already and the shift was set to “reset to default” the attendance status will show as “Unscheduled Work”
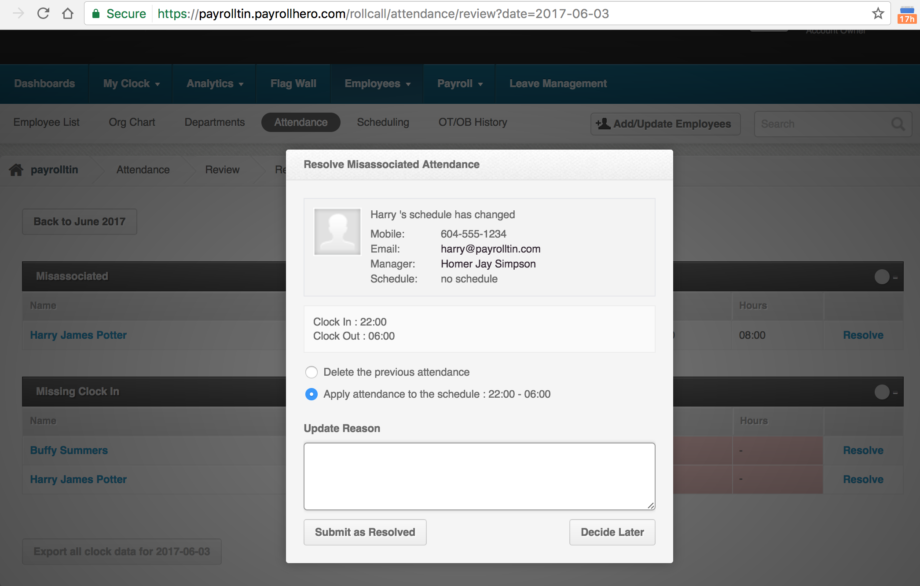
- If the schedule was added again, the attendance status will show as “Misassociated”
- Go to Scheduling Page
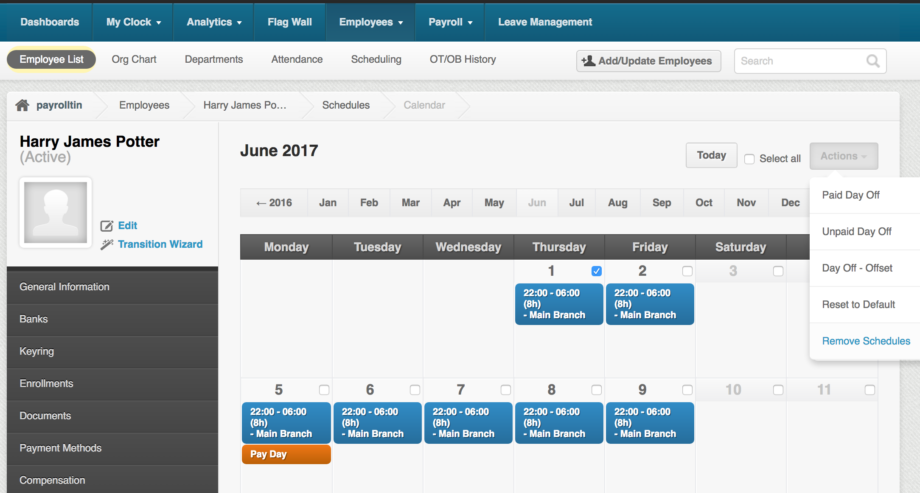
- The second option in removing shifts is to click on the “Remove schedule” under the actions tab via the Shift Cal page on the employee profile or the Scheduling (Weekly Scheduler)
- Go to the Employee Profile
- Click on Shift Cal
- Click on the the checkbox on a specific day
- Hover your mouse pointer on the “Actions” tab
- Click on “Remove Schedule”
- There should be a WARNING pop up message that will show up:
Applying the schedule removal will delete the existing attendance for this day.
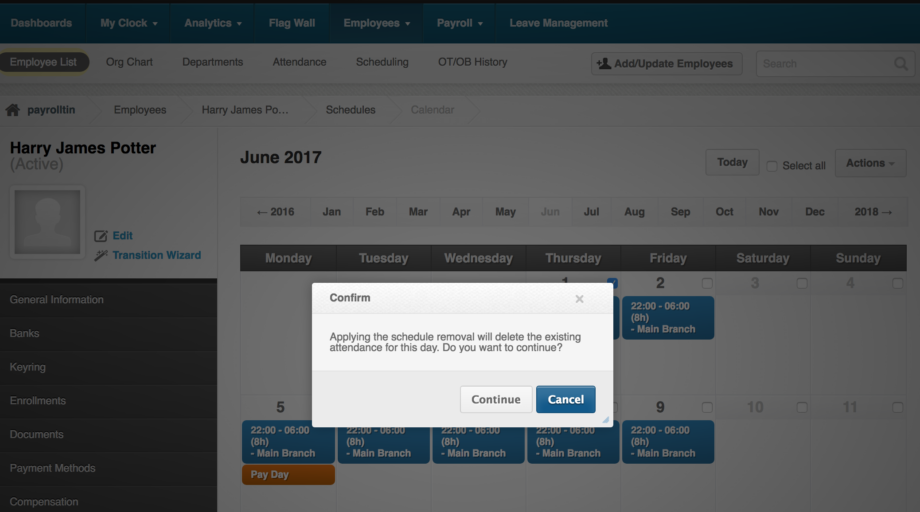
- If you click on “Continue” it should remove the SCHEDULE and delete the rollcall day for that day along with the clock in and out time of the employee.
- Any clockings that is also attached on the schedule will also be deleted and cannot be retrieved.
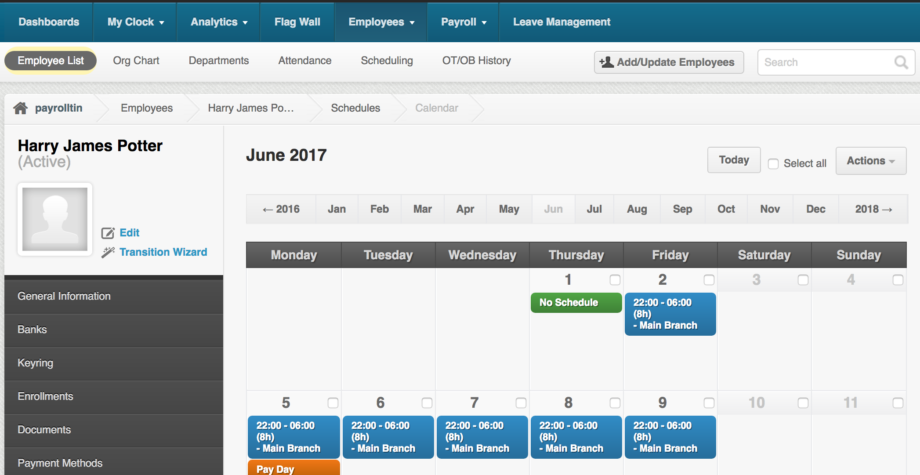
- After removing the schedule using the “Remove Schedule” option, on the Attendance page, it should show under PERFECT with “no schedule”.
- If published, the employee will NOT BE DEDUCTED as there is no schedule, meaning there are no work hours.
